For many photographers, the thought of going pro is very tempting. Perhaps you’ve gone through a change in career or family life, you love photography, or all your friends and family tell you that you’re great and that you should make a business of photography. However, you can’t just suddenly have a business one day, it takes time and preparation to create something brilliant.
You can start creating a new business by registering a new Ltd company online, giving it a name and actually bringing your idea to life. Then, once the business has been born, you can think of all the other details that go with it. You’ll be best starting off with a business plan, outlining all of the necessary information from your company name to pricing structures.
You’ll also want to consider hiring staff and what their employee experience will be like. There is a wealth of information on how to improve employee job satisfaction online for those who run businesses who also want to provide a positive working environment for their staff. Businesses committed to improving the workplace may want to find the best HR software that will allow them to streamline their dealings with employee matters like payroll and time-off requests.
What’s Your Business Plan?
Before you head out to spend a dime on gear, you need to develop a business plan.
It’s not easy creating a business plan on your own, many people use a business plan writer to help them make clear and precise decisions about how their business will run. It documents: who your clients will be, how you will go get them, what your pricing and delivery model is going to be, how you will advertise, what rewards you will offer to your first clients, how you will increase your visibility, how you will establish yourself as credible, and how people are going to find you.
Gear for Starting Up
Step one: have a business plan. Step two: get the gear that you’re going to need.
Camera Body
First, you will need a camera with interchangeable lenses. You will need to be an expert with whatever camera you choose. Learn it inside and out. The camera captures the image, you do not need to go into hock for the newest, latest and most expensive gear. A good mid-range camera will serve you very well. If you are going to shoot events that will not repeat, such as weddings, parties, shows, you want a body with two card slots that support writing to both slots at the same time. You should also plan on having a second body, very much like your first body, on hand as a backup. If you cannot afford a second body, rent or borrow one. It does not matter whether you choose a traditional DSLR or a mirrorless design. Both will get the job done. A camera that fits you and is fast for you to use is the best decision.
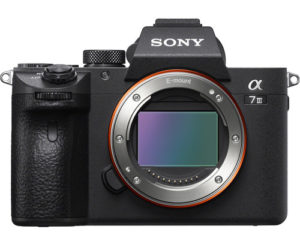 Figure 1: Sony’s a7 III is a great example of a pro grade camera at an economical price. 24 megapixels is a good resolution and the fast autofocus will make your working life easier, particularly with challenging subjects.
Lenses
You will be working in your studio and perhaps on location. Specifically, you will need high quality, optically fast lenses. Such lenses always cost more than the camera body. Unfortunately, you are not going to get by with the kit lenses that came with your camera. They are not optically good enough for pro work, and pro work means steady use and such lenses are not built for that kind of constant use and the abuse that goes with it. When it comes to lenses, you actually do get what you pay for. A do-it-all lens for about $600 is not going to do anything particularly well and your reputation and your success depends on the images that you make.
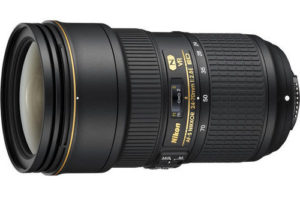 Figure 2: Nikon’s 24-70mm f/2.8 is a good wide to short telephoto example. Get image stabilization if you can make it fit your budget.
You’re going to need a medium wide-angle lens, a short telephoto lens, a mid-length telephoto lens and perhaps a macro lens if you will be shooting products, or babies or anything small. Look for something in the 24-70mm f/2.8 or 24-105mm f/4 range for the wide to short telephoto. A 70-200mm f/2.8 or f/4 will cover the mid length, and if you do need a macro, go for something in the 100mm range.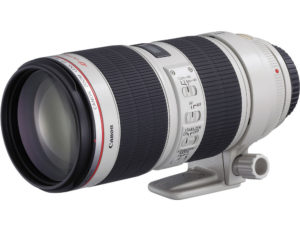 Figure 3: The 70-200mm is the go-to lens for professional portrait photographers these days. Get the faster f/2.8 if you can afford it. This Canon lens is an example of the type.
Your camera maker also makes very high-quality lenses to suit your needs. If you cannot find suitable glass, consider a different line, but you have good options for matched cameras and lenses from Canon, Nikon, Sony, Olympus, Panasonic and Fujifilm.
There are also excellent third-party lenses from Sigma and Tamron, but remember that the best glass carries a higher price. Look to Sigma’s Art series or Tamron’s G2 series for their best lenses.
If you don’t mind moving yourself instead of zooming, you can also consider an assortment of fast primes. This can be an excellent choice but will cost you more initially and will slow you down as you will be changing lenses more often. Outside of Canon and Nikon, the number of available optically fast primes is reduced. Fast glass is typically optically superior and is definitely better built. Sigma’s Art series primes are the best value out there right now.
It really doesn’t matter whether you shoot with Micro 4/3s, APS-C or full-frame sensored bodies. They all have the capability needed to get to a good looking 20? x 30? print. Go down a model in the camera body to be able to get better glass. Always. Cheap glass looks bad no matter how much you spend on the camera body.
Light
You must learn to control light, and that means getting and working with lights that you can control completely. This means flash and not natural light. If you are uncomfortable with off-camera flash, you have to learn it, love it and do so before you launch a studio. If you are shooting babies or video, continuous lights are superb, but they lack the power and the portability for the majority of still photography.
Since you are building a studio, you need and want studio strobes and buying anything with less than 500 watt-seconds per head is a waste of your money for your primary lights. 360Ws, 250Ws and high-end speedlights are fine for fill and hair lights, but just will not keep up in a studio environment. You may have seen pros who work with speedlights all the time. Top-line speedlights with extension battery packs are still only about 220Ws. You want strobes, preferably those that can run off a rechargeable battery because AC dependency is a gating factor and cables are tripping hazards.
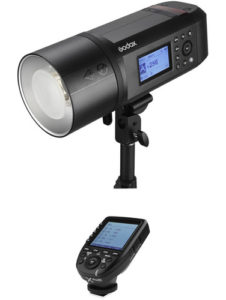 Figure 4: There is no substitute for power and fast recycling. This Godox AD600Pro is a superb strobe. Get three heads and don’t forget the Xpro radio controller for your camera.
Can you work with one strobe? Yes, you can. Plan on three. For a successful studio set-up you need three heads, preferably all identical, all radio controllable and all capable of working in both TTL and Manual mode. It is absolutely possible to work with Manual only strobes. A pro can get to ideal in three test shots on Manual. Someone without having built the skill will take longer and it will be worse the more lights that you have. TTL gets you 90% of the way on shot number one.
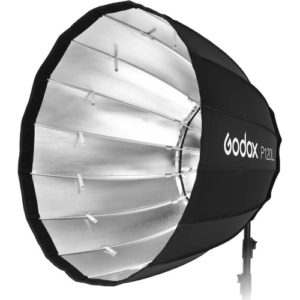 Figure 5: No soft box is as good for people as a parabolic. You have superb control of direction and spread and the light is beautiful. This is a Godox 120L, a 1.2m parabolic. Don’t skimp on size. Bigger is softer.
As an initial part of your light investment you will need some light shapers. Since softer light is more saleable and therefore desirable than harsh light, get one octa, or parabolic soft box about a meter across. Get two identical strip light soft boxes between 30cm and 40cm wide and between 1.5m and 2m tall. You will not need a ton of light shapers, and these initial three are massively flexible.
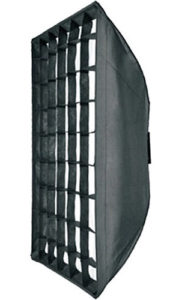 Figure 6: The most versatile of all soft boxes is the strip. Get two. This Godox unit is 35cm x 160cm, an ideal size. The grid is included with this example. You will require grids for your strip light soft boxes.
Next Steps
Starting a business and setting up a studio that you’d be relying on as your main source of income is a very large topic and the tips above only scratch the surface, but it’s a good place to start!
In Part 2 of this series, we take a look at all the other stuff that you are going to need to set up your studio.
Also, don’t forget to check out Henry’s Studio Photography Tips video below where Gajan shows you 10 simple ways to step up your studio shoots!
If you have questions about this or any other subject, please leave a comment below.
Until next time, peace.


COMMENT (1)
Pingback: Setting Up Your First Photo Studio: Part 2 | Henry's Blog