As many of us head out on vacation in the coming months, we may find ourselves in places where we would like to take a photograph of scenery or buildings, but getting an image without a huge crowd can be a challenge.
Here are two tips to help you get there. Just a heads up that it requires a bit of basic understanding of long exposures, using a remote release and stacking images in Photoshop CC.
Technique #1: Blur ‘Em Out!
- Set up your camera on your travel tripod and use a neutral density filter to give you longer exposures than you would without one.
- If you can get your shutter speed down around 15 seconds, that’s a good place to start.
- Now take an image!
What will happen is that the architecture will not move, but people milling around it will be blurred and those moving quickly will have nearly disappeared. This is a decent step when you don’t have a lot of time.
By experimenting with different levels of neutral density filters and small apertures, you can get fairly lengthy shutter speeds and in so doing, anything that is in any one spot for a short period of time will vanish.
Bear in mind that there may be elements that you want to keep that will become blurred if they move while you are making the exposure. Leaves blowing in the wind and moving water are two possibilities.
Technique #2: The Photoshop Automatic Mode
This method takes more planning on your part and will take you longer to accomplish because you will be making multiple images and then manipulating them in Photoshop. The first manipulations are script driven while the final ones will require some personal work on your part.
- Set your camera on your travel tripod and compose and frame your shot.
- Use your in-camera meter to discover the proper combination of ISO, shutter speed and aperture to make a well exposed image.
- Use a lower ISO for best colour and dynamic range, and a balanced combination of shutter speed and aperture.
Let’s pretend that the day is lovely and sunny so your meter will give you something close to 1/125 at f/16 and ISO 100.
- Now take a shot and check the LCD to make sure it’s what you want.
- Set your camera to manual mode with the suggested exposure settings above.
- This step is very important because you want all the images you take to be exposed exactly the same way.
- Now take 15-20 images at intervals of around 30 seconds.
- Your goal is to watch the scene and note what if any subjects are in the same place all the time. Those are the ones that will take a little manual effort to remove.
- The more images you take at longer intervals, the better your odds of clearing the scene, but you don’t want the light to be changing dramatically in the time period. (20 images at a 30 second interval will take about 10 minutes of your time.)
When you are ready to do the post processing, launch Photoshop CC. (I believe versions as far back as CS4 also have this capability).
From the ‘File’ menu > select ‘Scripts’ > select ‘Statistics’
You will then be presented with a dialog box. Browse to where your image files are. Be sure to set the Stack Mode to ‘Median’ and click the checkbox next to “Attempt to Automatically Align Source Images”.
Once your selections are complete, click ‘OK’. This will pull all the images together and overlap the areas that are consistent and drop out the parts where there is not consistency, such as where the moving subjects are.
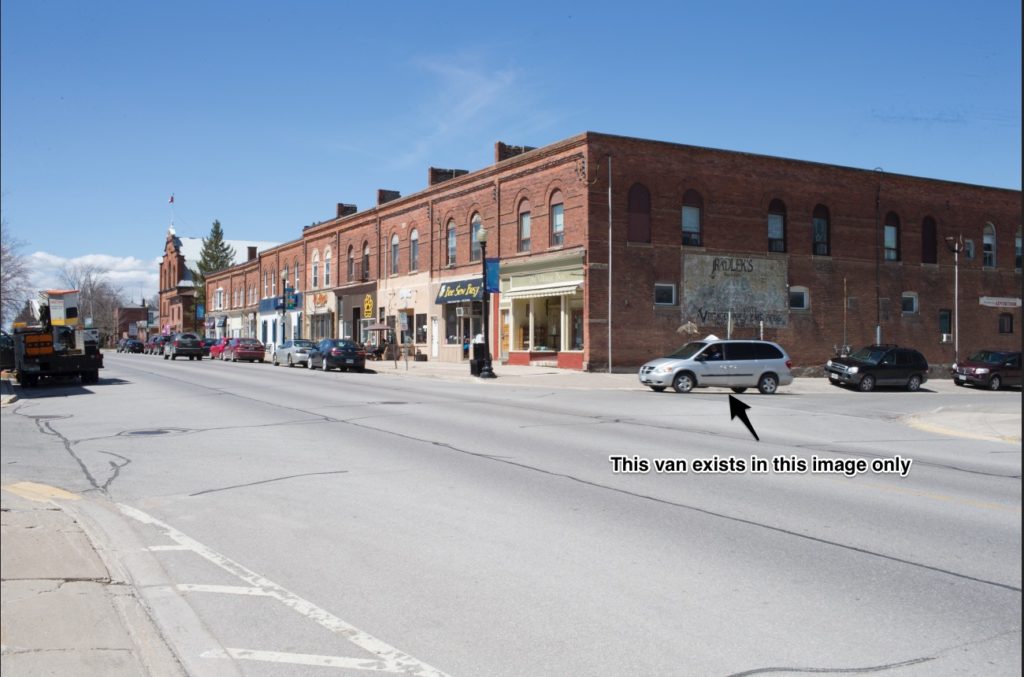
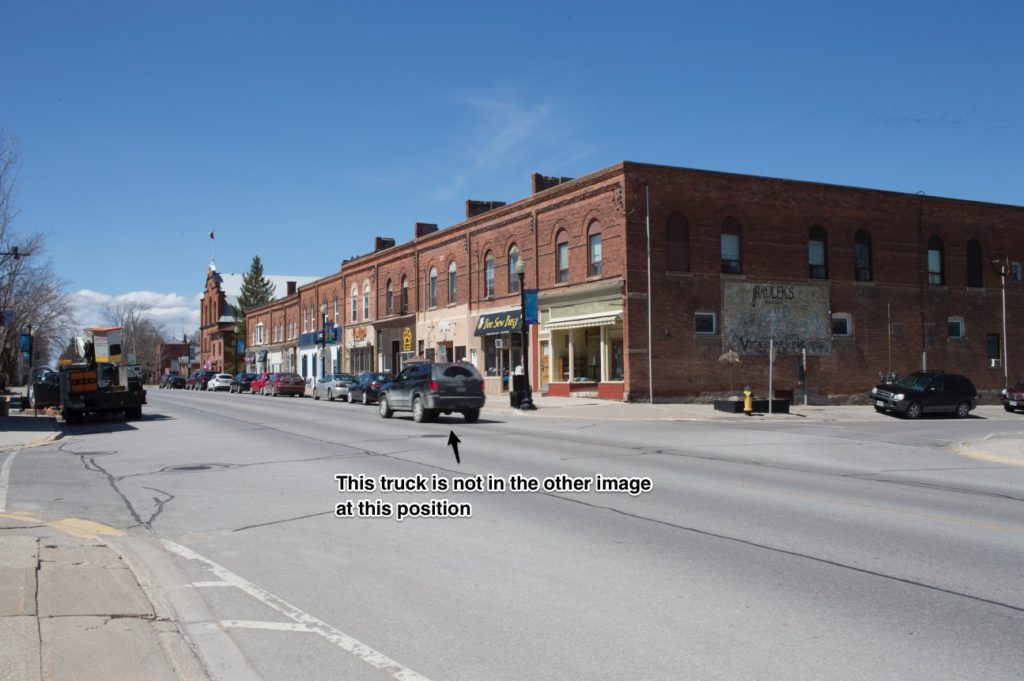
The following two images are source/ original images, taken at different intervals. They are mostly the same except for the presence of a unique vehicle in each.
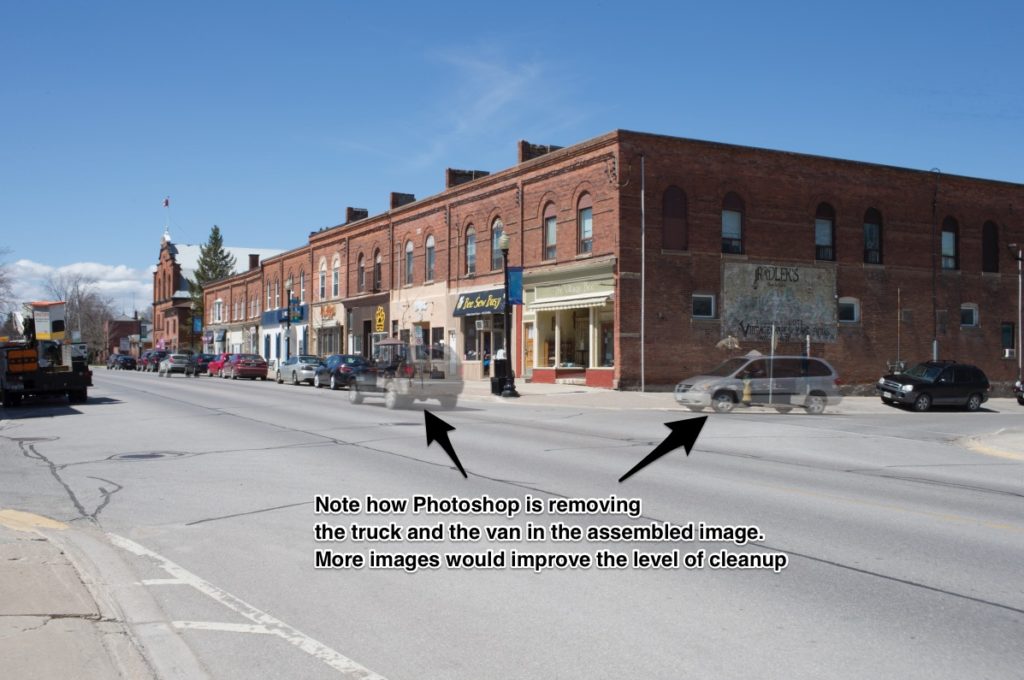
The third image shows how the process starts removing elements that are not present in all the images. This small example is effective because you can see the partial removal of two vehicles.
Plainly, only two images alone are not sufficient for a clean up. By shooting more images your odds of cleanup working automatically improve significantly. The two samples were shot offhand, tripod use would have been better because I would not have had to crop in as much to deal with alignment issues.
Your final step is to use the clone stamp and healing tools to remove anything that remains that you would like to be gone. You could have done the second step manually by building masks, but this system is very quick and very efficient.
It’s fairly straight-forward so don’t be afraid to give it a shot!
Until next time, peace.
