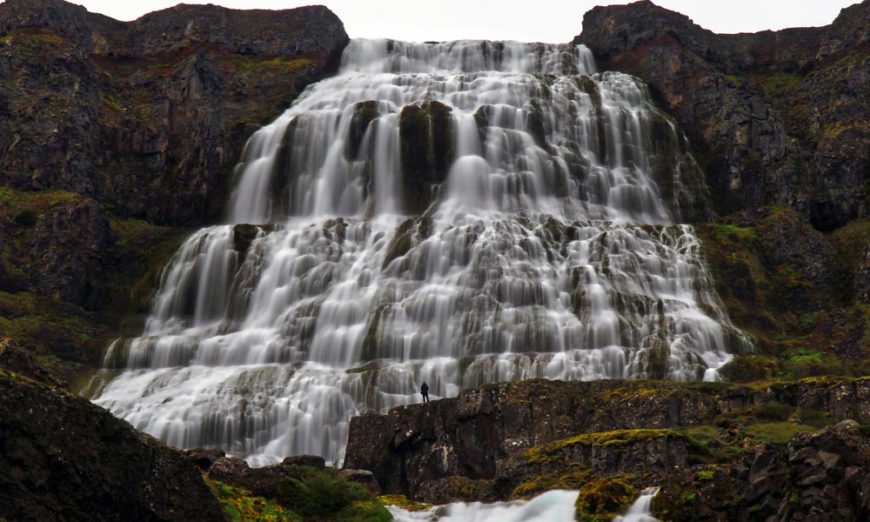
There’s magic in long exposures, particularly ones made outdoors that draw in scenes and overlay them with a sense of motion. Making these images is not hard, so we will start with the necessary pieces of gear and then work through some techniques for success.
Needed Gear
The most critical piece of gear for long exposure work is a solid tripod. This sounds simple, but it’s the main source of problems that I encounter with folks who complain about their long exposure work.
The problem is one of stability. Too many folks get caught up in the goal of having the lightest, smallest tripod and end up sacrificing the stability that is the whole point of a tripod. You aren’t going to get something stable out of a cheap set of legs and a wobbly head. Fortunately, you can get a really nice tripod without breaking the bank. If you already have a solid tripod, that’s perfect, but if not, have a look at the Cameron CF710 leg set. You will need to add a tripod head of course and I will come to that. I always recommend buying your last tripod first as a good tripod will last a very long time, whereas cheap ones get piled in closets. I also recommend a solid ball head as these are easy to adjust and work well for getting alignment properly and quickly. The Cameron BH30 is a very decent ballhead for the money. Alternatively, if you are willing to spend a bit more, consult your Henry’s sales professional about products from industry leader Manfrotto. Just remember that when buying a leg set, carbon fibre is always your best choice.

Every camera has a release delay, either in the form of a self-timer, or an app for your smartphone that connects to the camera when this connectivity is supported. You don’t want to be touching the camera when the shutter releases.
For really long exposures, using the B (bulb) mode, you will find an external remote with an illuminated display to be a real boon. Personally, I prefer the wired type to the wireless type because it means that there is one less battery to fail during a long exposure.
You should of course have spare batteries for your camera. Your exposure time is going to be limited by battery capacity. Keeping a few freshly charged batteries in your bag is a good idea. My preference is for manufacturer batteries instead of clones because many cameras look for a chip in the battery for proper operation.

In addition to your camera kit, I would strongly suggest a folding stool or chair, and a selection of clear garbage bags. Put one on the ground and cover it with a white towel. Put all your accessories on the towel so they are easy to find in the dark. The garbage bag keeps moisture from seeping into the towel from the ground. A clear bag placed over your camera will protect it from rain / snow and other flying gunk and provides a minimal level of insulation.
As you will sometimes need to change your camera settings, and do not want to destroy your night vision, I recommend getting yourself a flashlight with a red lens. Sometimes you can get lights on a strap that fits round your head that has a red lens. I like these best.
The How-To
Accept going in that long exposure photography is a creative process. There are no firm and fast rules, but some tips are going to save you time and frustration.
Use a wider-angle lens and focus it appropriately. Depending on your camera, autofocus may not work in really low light, so you will have to focus manually. Once focus is achieved, turn autofocus off to prevent the camera from hunting should the shutter release or back button focus be tapped by mistake. Think about how much depth of field you will want and use this as a priority element. If your camera doesn’t have a depth of field scale (it likely does not), an app such as Photo Pills (available for iOS and Android) does precisely this sort of calculation for you.
Your camera’s built in meter works to achieve an exposure that will deliver an average middle grey tonality. This is mostly useless for night and other long exposure photography, so plan on using the camera in the M or manual mode. You can certainly use the meter to see what it proposes but remember that this is one of those rare situations where automation may not deliver a solid exposure.

If your long exposure photography is being done during daylight hours but you are using a strong Neutral Density filter such as the Lee Big Stopper, that cuts 10 stops of light, you will not be able to depend on your camera light meter as the incoming light may be reduced so low that the meter cannot cope. The better pursuit is to do all your focusing and metering without the Neutral Density filter in place, then put the filter on, and use an app like ND Timer (available for iOS and Android) to calculate your actual exposure based on the impact of the filter. It’s what the pros do, so why not you?
Plant your tripod in a solid location. If the legs have ground spikes and you are on softer ground, use the spikes. Avoid placing your tripod on a road or bridge as vibrations travel for many kilometers and will spoil your shot. I had a long exposure go bad because my tripod was about 15 feet away from Highway 400 and the trucks going by caused sufficient vibrations off the road to create shake.
Your camera has a setting called Long Exposure Noise Reduction. This can sometimes be useful, but it chews up battery and doubles your exposure time, by immediately making a black exposure for the same duration as your main exposure. For example, a 30-minute exposure would actually take an hour. Today’s cameras and post processing tools are really good and the need for this function has diminished significantly. I have not used it in years without any negative impact. Long exposures do create digital noise because the sensor gets hot. However, newer cameras that shoot video have introduced technology to reduce this as video is more demanding on a sensor than a long exposure.
Unless you have a compelling reason not to do so, always shoot in RAW at the highest bit depth that your camera supports. RAW means that you will need to do some post-processing, but in long exposure work, you would be doing so anyway. Shooting JPEG in camera just throws away so much useful data before you even see the file, that it does not make sense.
Long exposure photography is sometimes a game of chance. Things may work out brilliantly or they may not work out at all. That’s the magic and joy of this kind of work, trying different things to see how they work out. It’s a thinking process because you won’t be spraying and praying, purely because you will have a wait period during the exposure.
Conclusions
Long exposure photography, whether performed indoors or outdoors is great fun. Take your time, take notes about what you are doing in each shot, and assess each of the outcomes to assess what you did that worked and what you want to try differently. These long exposures will highlight issues in core practices such as focus and stability, so watch those closely. If you have questions about this subject, please leave a comment on the Henry’s Blog.


