It used to be that shooting panoramas required special gear and lots of math and so, many “regular” photographers never bothered to try. Yet panos seem so easy on your smartphone. Hmm, what are the steps to shoot great panoramas with your more regular camera?
It’s easy so let’s go!
What You Will Need
Well you are definitely going to need a camera. A wide angle to medium focal length lens is a good choice to start with but you don’t need a super wide because the width is going to be used for the short side. Huh? Stay with me.
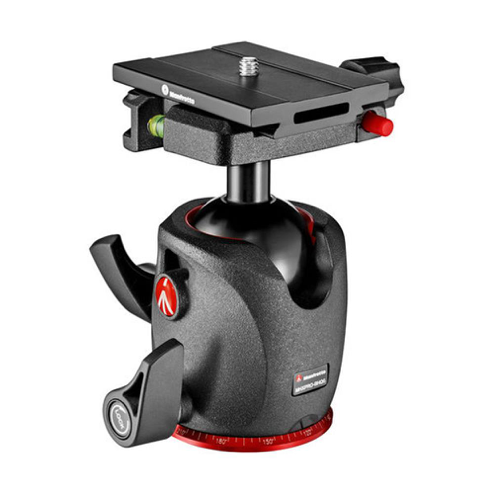
A tripod with a head that allows for panning is very useful, but you can actually shoot panos handheld. That said, when the camera is stable in two dimensions, the work is better. If you want to do multi-row panoramas, a tripod is a necessity.
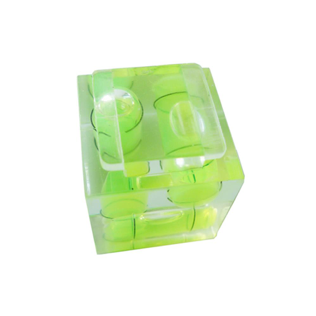
A hotshoe bubble level, or the electronic level in your camera, if it does this, is not absolutely needed, but they really do help. Most cameras these days have e-levels built in, and if yours does not, a bubble level is pretty cheap and very useful.
The Process
A panorama is shot in a series of steps of individual images that overlap each other that get combined in software. Whether that is software in your camera or software in your computer is a personal decision, although computer-based processing software is going to deliver the best outcome.
My recommendation is to shoot in RAW mode, but if you prefer to shoot JPEGs they can work too, just with less information and image quality.
In choosing a lens, you are going to be shooting with the camera perpendicular to the long side of the panorama. This is what I meant by the lens angle of view defining the short side. In the example panorama used below, I was using a 35mm lens on a full frame sensor giving me an angle of view on the short side of about 53 degrees. This gives a sense of space without lots of bending and twisting in the lens. Go only as wide as you need to in order to achieve the short side angle of view that you need.
If you are going to be shooting a very wide or very tall panorama, resist the desire to put a polarizing filter on the lens. Remember that polarizers go from no effect to full in only 90 degrees, so a wide pano could end up with weirdness in the skies. You can create a polarized look in post processing, as you will see in the final image in the example.
The Steps
Mount your camera on your tripod head and put it in the vertical orientation for a wide panorama, or the other way around for a tall panorama. Let’s go with a wide panorama for the first one.
Now use your level to get the camera properly leveled on the tripod so when you pan the horizon stays level. The camera can be tilted up or down, you just don’t want a horizon that is rising or falling.
Find the places where you want to start and stop your panorama. Some people (like me) like to use a white grease pencil to chalk start and stop points on the tripod head or remember the numbers for the index mark if your head has a scale on it. All my tripod heads have scales on them, handy when I leave the grease pencil somewhere that I cannot find it.
You can shoot in either left to right or right to left orientation, your choice, but for this example we will shoot left to right. Pan the camera so your primary subject is centered in the frame and focus it. Once focus is set, turn autofocus off. For best results, take your camera settings and set them individually in Manual mode. These steps prevent focus shift and exposure shift during the pano. You will have to work reasonably quickly to avoid exposure changes if the light changes, but it’s not hard.
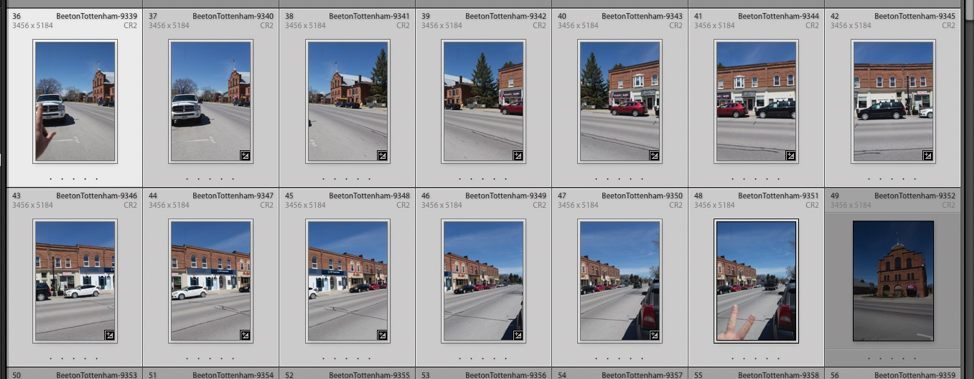
Pan the camera to your start point and hold one finger up in front of the lens. Press the shutter. This is your first marker shot. Take another one without your finger there and without moving the camera. This is shot number one.
Slowly pan the camera to the right so when you stop at least 1/3 of what was in shot number one is still visible. This information is what the software will use to merge the panorama. Don’t be afraid to take more rather than fewer shots. Press the shutter for shot number two.
Continue this pan and shoot with one third overlap until you reach your end point. Shoot the image. This is your last shot. Now hold two fingers out in front of the lens and take one more. This is your last marker.
The beauty of this method is that in a single outing, you can shoot lots of panorama setups and your marker shots will clearly tell you which ones to merge when it comes to post processing.
When you get to your computer, import the images to your photo application in the usual way. However, if you normally apply any kind of editing presets or lens corrections on import, do not do these steps at this time as you may get results that you do not like.
For the rest of the steps, I am going to use Adobe Lightroom Classic as my example application although there are many applications that do panorama merging. In the Lightroom Library module, select the images that you want to merge. They are easy to select because you will have a marker at the beginning and the end of each sequence. Do not include the marker images.
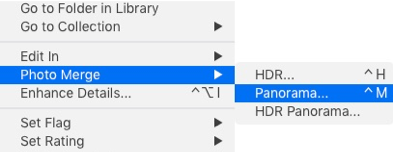
When you have selected the images that you want in your panorama, right click on any of them and from the menu that pops up, choose Photo Merge and then Panorama.
The first step that Lightroom will do for you is to build the Panorama preview window. This window has some options that you are going to want to use to make getting to your panorama much easier.
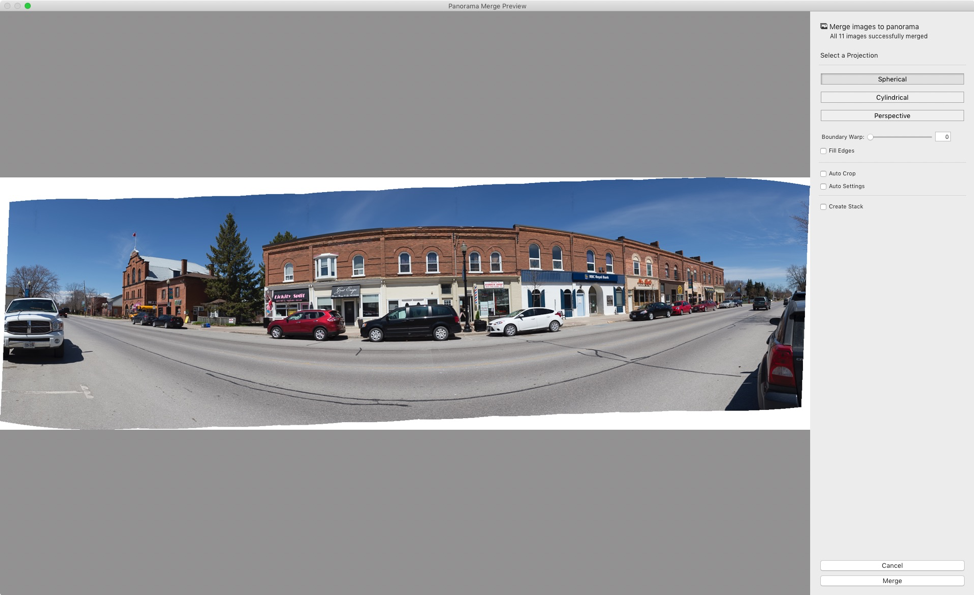
In the window options, you have three options for the panorama construction mode. Try them out to see which one works best for you. In this example, I will use the default of spherical.
Move the slider called Boundary Warp to adjust for some of the bending and twisting. The right choice is the one that you like the best. In my example, I am using 100% correction.
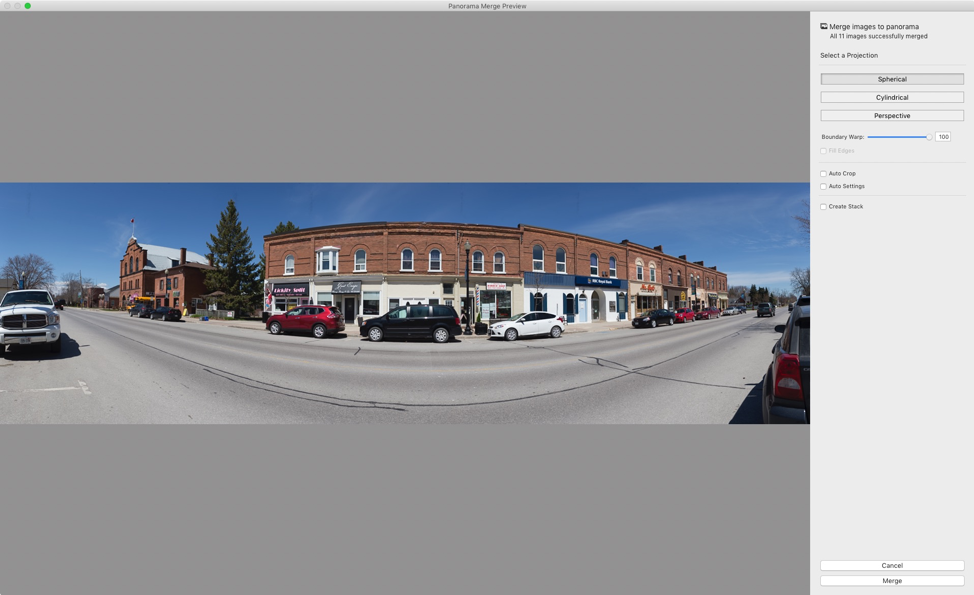
In my example, boundary warp corrections have filled in all the white space, but if you see white space, try the Fill Edges checkbox. This uses an advanced fill algorithm, so you don’t have to use the crop function to knock out the white areas.
You can choose the checkbox for Auto Settings, but I would rather do the editing myself in the Develop module. Click the Merge button near bottom right and Lightroom makes the image. If you used RAW files as your sources, the panorama is also a RAW file. This is very beneficial in terms of how much data is retained.
Open the Develop module and perform that edits that you like to complete your image. By leaving your editing until after your Panorama merge, you save time and get more consistent results.

My goal was to create an image of what a small Ontario town looks like during a summer drive. You get the sense of entering and leaving town in a single image, something that would be impossible in a single shot. There is a bending to the street, natural to a panorama shot this close but I like the emotion that this creates.
Really beautiful panoramas do not deserve to die on a phone or hard drive. They should be printed! Consult with your chosen printing location to determine that they print panoramas, and then work with a framing shop to get a frame made for your image. A good framing shop will also be able to dry mount your image to a solid backing, so it doesn’t flex or move in the frame.
Conclusions
Panoramas are both fun and challenging to shoot and are really very season independent. You can even do them indoors; we see more of this in some real estate work to give a sense of a room. As you’ve seen, it is not hard, and with a bit of effort, you could produce something quite spectacular. If you have questions about this subject, please leave a comment on the Henry’s Blog.
Until next time, peace
