There are only two kinds of digital photographers who use cameras with interchangeable lenses, those who have had to deal with sensor dust and those who have not had to deal with sensor dust, yet. If you are in the latter group, be ready, because it will happen.
How do you know that there is dust on your sensor? There will be small dark spots on your images, and they will be in the same place in all the images since the dust got there, and will be there until you clean the sensor.
Sure, you could fix the spots in Lightroom or Photoshop by why go to all that annoyance when keeping your sensor in good shape is actually pretty easy.
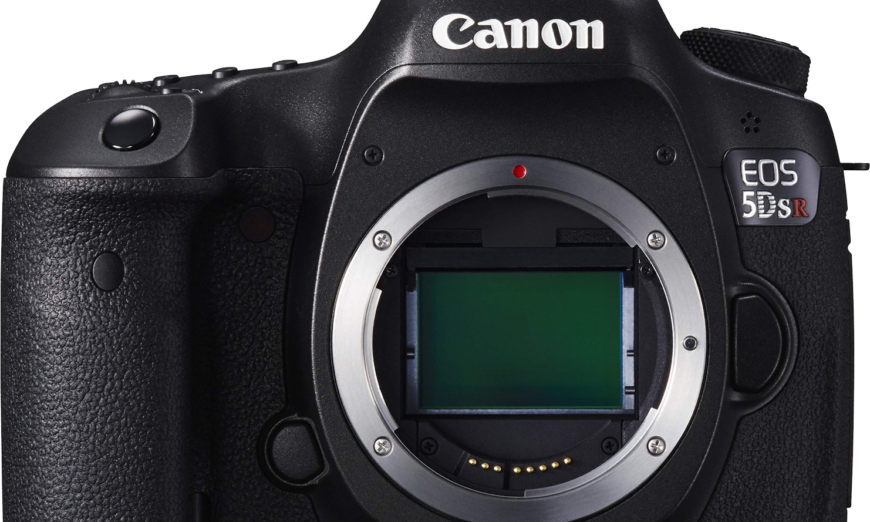
The first thing to realize is that you aren’t actually cleaning the sensor. You’re cleaning an optical glass protective plate on the front of the sensor. The second thing to understand is that while this is a sensitive part of your camera, and you could do real damage, if you proceed slowly and cautiously, you will likely be fine. And, if you don’t want to do the cleaning, your authorized service centre can do it for you. In fact, if you have anything other than dust on the sensor, my recommendation is to get your camera professionally serviced.
Many cameras have sensor dust removal functions. Basically they shake things a bit in the hope that the dust falls off into a dust trap. It works sometimes, but sometimes the dust develops an electrical charge and won’t just fall off. This is more likely to happen if you are changing lenses with the camera powered on. Here are five things to follow when working to minimize the collection of sensor dust.
- Make sure that the camera is powered off when changing lenses
- Point the lens mount towards the ground, not straight up, to avoid having gravity help deposit sensor detritus
- When working in dusty areas, particularly those that are very dry, try changing lenses in a protected space, such as your car, a tent or even inside a bag
- Wipe the camera and lens off with a clean lint free cloth before changing lenses
- Accept that in camera sensor cleaning won’t work with persistent dust or dirt, so learn how to clean your sensor safely
If you do end up with dust on your sensor, there are lots of products that promise to clean things up. Many are very expensive and include extremely expensive magic potions and swabs made from unicorn tails. Or they should be considering the cost.
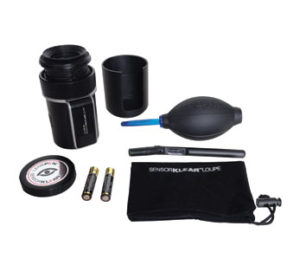
 The system that I prefer is easy to use and comes from the same people who make the “must be in your bag” LensPen. It’s called the Sensorklear Kit. Their kit contains a blower that has a HEPA filter on the inlet so you aren’t sucking dust into the bulb to blow on the sensor, an illuminated loupe with a work area slot, and their unique sensor cleaning tool.
This tool looks a lot like a lens pen but is not a lens pen. Don’t use a lens pen on your sensor. Use the proper tool. I know that sounds obvious, but some folks don’t like to read documentation. Cleaning your sensor means that you will need to know how to set your camera for manual cleaning. For many cameras, this is a menu option, but you really must review this section in your manual and practice it a couple of times before you attempt a cleaning, just to know exactly how the process works.
Cleaning your sensor is quite easy. In fact, to make it even easier, I’ve provided a simple 8 step program for you to follow using the Sensor Klear system.
- Go to a clean place to work without a lot of dust or pet dander in the air
- Ensure that your camera battery has a good charge because you may need the camera to hold the mirror up out of the way if one exists, or the shutter open in the case of a rangefinder such as a Leica.
- Engage the manual sensor cleaning process for your camera. You did practice this in advance didn’t you?
- Place the loupe over the opening and note the presence of dust or marks
- Invert the camera so the lens mount is facing down and use the blower to try to remove any dust first. This often gets the worst of the dust out, so don’t skip this step
- If there is still dust, insert the cleaning wand through the slot in the side of the loupe and watch as you remove the dust or marks
- Retract the wand and inspect the sensor, repeating use of the wand until all the dust is cleaned. Be patient and don’t rush.
- Once clean, deactivate the manual sensor cleaning mode and mount a lens
The kit will last you a long time and does a great job unless you have something really smeared onto the sensor glass or really stuck on there. And remember, if this sounds like more that you would care to do on your own, you can always send your camera to your authorized service centre to have the sensor cleaned.
The kit is available from your local Henry’s store or on the Henry’s eCommerce site. Here’s a link to the complete kit which sells for about $90. Keeping your sensor clean will reduce your work in post processing. It will also reduce your frustration level. Sensor dust is a normal by-product of using your camera, so the more you shoot, the greater the probability that you will pick up some dust. You can work as noted on reducing the likelihood of picking up dust, but it cannot hurt to know how to address the problem when it arises.
Until next time, peace.


