One of the most compelling aspects of photography is the constant learning journey we undertake. From the very first moment that you pick up a camera, you begin to follow a learning path. The path is as long or as short as you want it to be, driven primarily by your goals and aspirations as a photographer.
Over my many years as a photography educator, I’ve seen people struggle with how to best educate themselves on how to reach their photography related goals. Most experienced photographers will tell you that there is always something new to learn. A technique to master, a different genre of photography to explore, and new tips and tricks to master.
There are essentially at least three methods that I have observed to approach learning photography. Each has their positive and not so positive aspects. Let’s take a moment to explore them.
Method 1: Trial and Error
The first method is simply “trial and error”. This is the most challenging approach for a new photographer. Essentially this method involves a lot of exploration and observation. What happens if I choose this setting, or push this button, or turn this dial? How is my photo affected by where I stand when I take the photo, or by which lens I choose to use?
The primary drawback with this method is that cameras are, by their nature, efficient machines but not intuitive. Turning a dial or changing a setting and taking a photo may help you understand what that dial does to the produced photo, but it can just as often mislead you.
Cameras can often require a group of settings to be changed to achieve a desired effect or outcome, in addition to a technique. The advent of the mirrorless camera has changed this somewhat for the better. Mirrorless cameras tend to show results based on setting changes before the shot is taken.
However, if you are a new photographer and want to give this approach a try, here are a few tips to begin with.
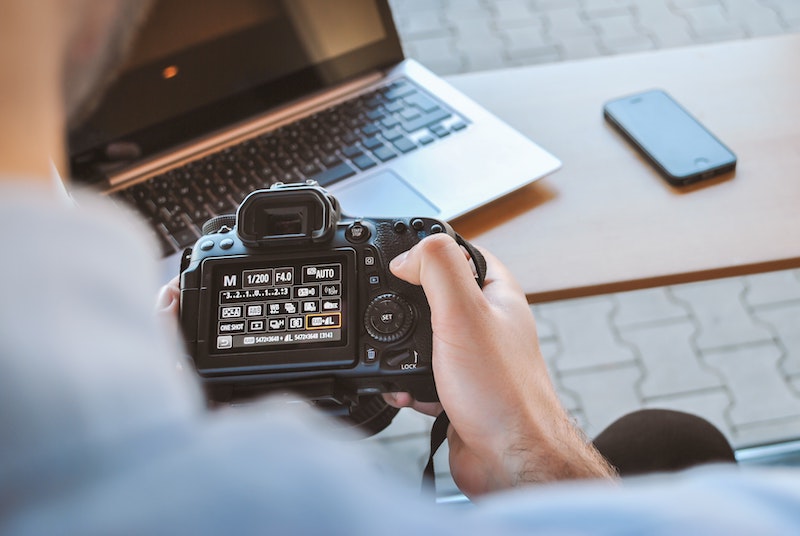
First, set the camera to the ‘P’ shooting mode on the mode dial located on top of the camera. Shooting modes are like pre-defined sets of camera settings that offer greater or lesser camera automation, depending on what you are trying to achieve. The shooting mode also plays a role in determining which creative features of the camera you wish to employ for your next shot.
The ‘P’ shooting mode is mostly automatic in nature (the camera looks after vital things like exposure). However, this mode allows access to many of the most often used camera functions such as controlling precisely where to focus, and your ‘exposure compensation’ setting for adjusting exposure to your liking, and more.
Getting out of the automatic mode or ‘AUTO’ will allow for greater exploration of the camera controls.
But beware: sometimes experimenting with these camera settings can lead to frustration, so you should locate the camera’s reset option in the menu system and use it to reset the camera if needed. No harm will come to the photos you’ve already taken if you reset the camera.
Another tip to keep in mind: the camera remembers all setting changes you make, and sticks with those settings until such a time that you change them again.
Photographic methods (such as freezing or blurring action, creating focused backgrounds, etc) will require the use of more advanced shooting modes such as Shutter Priority and Aperture Priority. These shooting modes will require some understanding of how to control depth of field, and what shutter speeds will affect a subject in motion, in addition to shooting techniques to get the most out of these creative effects.

Samples of Depth of Field / Shutter Speed
New photographers can spend dozens or hundreds of frustrating hours experimenting with camera settings and reach only rudimentary conclusions about how to control the outcome in a given scenario. If you have the patience for that, you are to be commended!
Often times after much experimentation and changing of settings, you may settle on settings that ‘seem’ to work for simple photographs, but you may lose your patience for more experimentation. The net result is that you give up on progressing to the more creative shooting aspects that your camera is capable of.
The camera is not typically designed to help or assist you learn how to use it. It doesn’t know your desires – the design of the camera is mostly based on the pre-supposition that you understand how the changing of settings will affect the outcome. Much like the design of a typical car presumes that you’ve had some training on the operation of the controls for safe, successful travel.
For obvious reasons, the ‘trial and error’ method can lead to a good deal of frustration if you’re looking for your camera investment to pay off quickly in terms of beautiful photos. The manual that came with the camera can be of some help, but manuals are often encyclopedias for camera functions. They often do not offer full and relevant context for how to use the functions and when. (You can probably tell that I am not the biggest fan of the trial and error method.)
Method 2: Using Video and Books
The second method that people have been using involves some level of research. We quite often think of YouTube as an excellent resource for learning many skills. There are countless videos posted on YouTube that can be very instructional and helpful. There is no guarantee that the videos you discover (amongst the tens of millions of videos on the site) will provide the answers that you need, however.
Simply put, the creators of these videos are not always very detailed teachers or are lacking in the communication skills to translate what can be complex concepts into simple ones. Some creators also make assumptions of the skill level of the people watching their videos, and those assumptions may not be correct.
I have found in my research that most videos suffer from some kind of weakness that makes them less than compelling sources of information – but they are absolutely better than nothing at all! If you are the kind of learner that does not do as well with videos, consider adding some good books to the mix. If you are new, then books designed for new photographers are your best bet.
Ultimately using videos and books will be infinitely more effective than simply using the trial and error method. The weak link of videos and books would be that you cannot ask them questions when something isn’t clear, or ask those ‘what if?’ types of questions that can often come when the author did not anticipate them.
There is still value there, if you can find videos and books that work for you. This is much better than simply picking up the camera and crossing your fingers that you will gain greater understanding of settings and methods by simply experimenting.
Method 3: Finding a Mentor
The final method is fairly straightforward, and awesome. Finding a photography mentor, if you can, this can be a wonderful way to gain the learning and experience you need to succeed in advancing your skills. If you know a photographer who clearly has acquired skills and is willing to share their knowledge with you, then you’re a very lucky individual! There really is no equal learning environment than being with someone who can show you exactly what the camera controls do, the techniques employed to use them well, and how the camera operates.
However, it is often true that in any learning relationship, your success can often be based on how skilled your mentor is in the art of teaching, and their interest in helping you. Great photography mentors have more than the camera and photography skills under their belts. Great photography mentors are skilled in the art of effective communication.
Turning what can be complex concepts into simple, digestible information is a rare talent that does not come easily. So, if you befriend a photography mentor that has a laid back and patient way of clearly explaining concepts, then you should cultivate a relationship with them and be grateful if they are willing to take you under their wing to feed you the information that you need.
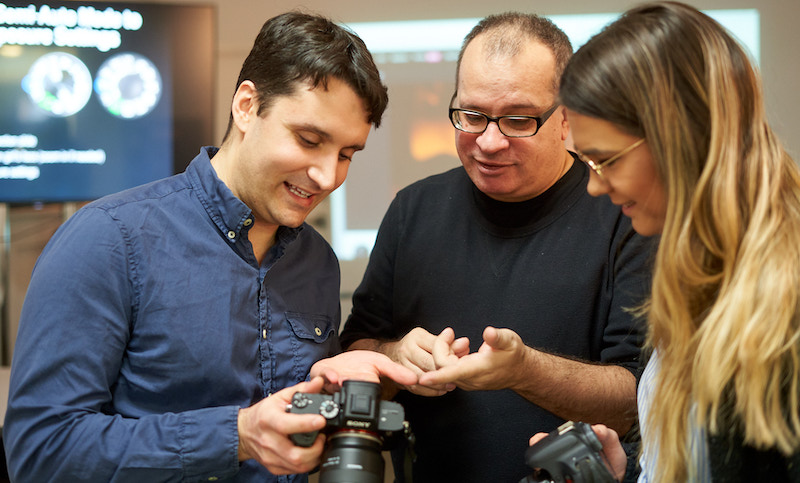
Jim teaching a photography class
There is no doubt that being ‘under the wing’ of a knowledgeable and patient teacher such as a mentor is a great way to go. But what if you don’t know of anyone who qualifies for this role?
The simple answer: you can always hire a mentor to assist you. Basically, a photography teacher is just another kind of mentor.
- Teachers are usually skilled in communicating effectively.
- Teachers often have a course or well thought out plan to deliver training in a way that makes progressive sense, and cuts out irrelevant information.
- Teachers make it their business to make you successful as they are obligated to do so.
In my experience, paying someone a reasonable fee to give you the true fundamental foundation you need to be successful is the most efficient and pleasant way to go. It saves an enormous amount of time and frustration, and maximizes your chances of skilling-up quickly to get the most out of the gear you purchased.
It is absolutely true that in the minds of some, paying for a photography course carries the stigma of “paying for something you could get for free” using methods 1 or 2. In fact, some might argue that if they pay for a good photography course, they’ve just spent the money they could have otherwise used for a useful piece of photography gear.
However, what good is the gear if you don’t know how to use it to its full potential?
Whichever method you decide to go with, keep the following tips in mind:
- Buying the ‘best of everything’ is often not a substitute for knowledge. In fact, more expensive cameras are often more sophisticated because they are designed for working pros who have the skills to operate them. If you want ‘the best’, go for it! But ensure that you take steps to learn how to use these items.
- Quality lenses are often a better investment than an upgraded camera body. The lens is the weak link in the system, and superior lenses will make your photos sparkle just that much more. But again, knowledge on how to use them well will help a great deal.
- Find out what genres of photography excite you, and start with those. Each genre of photography has its own set of methods and gear choices that will help. Landscape photographers will want completely different lenses than a photographer more interested in sports or bird photography.
- Get inspired. Perform google searches on the internet for the types of photography that inspire you and take inspiration from those images.
- Check out the free online seminars offered by Henry’s on a regular basis. Henry’s has done an amazing job of lining up different creative people for interviews and seminars to give you even greater insight into various genres of photography and much more. There’s always something new and wonderful to learn!
As a photography educator myself, you will no doubt sense an inherent bias in my words and advice about camera courses. And you’d be completely correct in that observation. My bias comes from having taught hundreds of classes over many years, and seeing the evidence before me of what a substantial, positive influence a good camera course can have.
The kind of comments I am accustomed to hearing from students that I have taught range from “I should have done this years ago” to “I thought I knew what I was doing before”. I must also share that when I see the light of understanding shine through a students eyes, when they get it and pick up those new skills, it’s a very rewarding moment. People who teach for a living will understand what I am talking about here.
Here’s a simple tip for everyone, whether new to photography or returning after a long absence. There are fundamentals (settings and techniques) that you absolutely need to know in order to progress. Use whatever learning methods that suit you and begin to understand these fundamentals as they are the foundation of all good photography.
Learn how to create depth of field effects to blur your background, learn how to master precision focus for sharp images. Get curious about shutter speed, and how the manipulation of shutter speed can affect the freezing or blurring of subjects in motion. Learn how to adjust picture brightness through ‘exposure compensation’.
Explore compositional rules and how they can open the door to more interesting photographs for you to make. Along the way, learn how to solve photographic related problems when they occur and even before they do!
The joy of producing a wonderful photograph that is yours forever is a feeling like no other. Keep shooting, explore, create…and have fun!
