
How many times has it happened where you take a shot, using the camera settings and things just don’t look quite right? Probably not all that often, because today’s cameras do an amazing job most of the time. Manufacturers have analyzed millions of images to develop automatic and semi-automatic modes that do a great job for you. But let’s talk about two situations where the automation may not do what is needed.
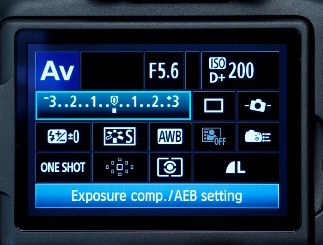
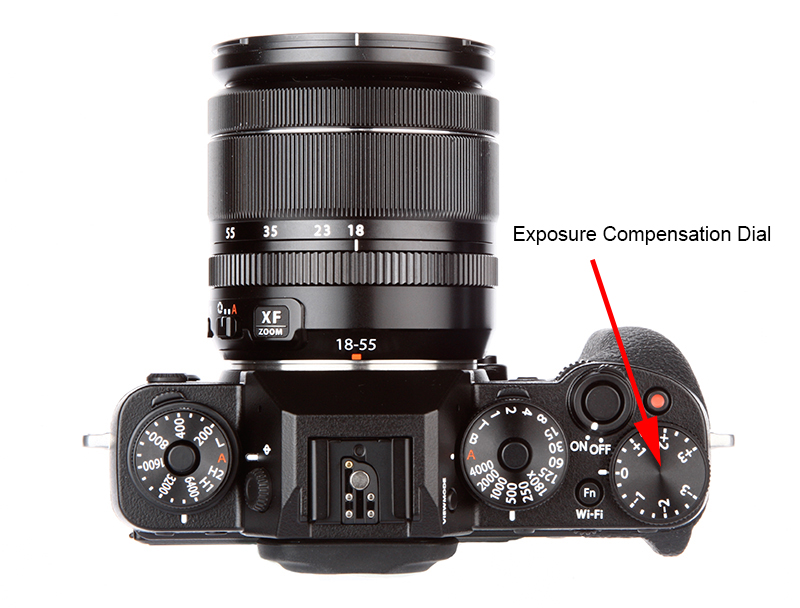
Winter is coming. You are now either cheering or cursing. The reality is that a great winter image is inspiring. Great skies, vistas of snow, friends and family enjoying activities and time together. Awesome memories. Except that, everything seems a bit dark… This is actually expected. Your camera’s very sophisticated systems know that on average, the average scenes have a tonal representation of a mid-grey. Technically it’s usually 18% grey but let’s not get bogged in numbers. The fix is simple and it is called Exposure Compensation. Your camera has a button, a dial, menu item, or icon on the touchscreen that looks like a box containing a plus sign and a minus sign. This means that you can choose to add or subtract exposure for an image without having to go full manual. Often this is just a click of an arrow or turn of a dial. For the winter scene, white is brighter than the average grey. The camera tries to average everything to grey so you have to tell the camera you want more exposure, specifically keep the whites, white. If it’s a bright sunny day, make a setting of +2. If it’s overcast, try +1 and work up to +2 until you get what you want. This is particularly critical if you are shooting JPEG because of the compressed nature of the file. Voila! Now your whites are white, your friends and family aren’t overly dark and that shot of your child’s first ski lesson is awesome, deserving to be printed and hung in your home. You know where this also works? The people who hate winter sometimes head south where the sun is warm and the beaches are white sand. Same simple step applies. Add some exposure and you’ve got a better image.
But wait, I promised two situations and you may have guessed that the other situation is when things are more black than grey. Consider the shot around the fire apres-ski, or the music show at the resort lit only by torches and the moon. These are wonderful memories and you want to have them forever, so take a picture. But when you do, they seem a bit muddy, and may even look kind of speckled. Both scenarios mean that the camera will try to make all that darkness grey. You can simply adjust this by using the same tool to reduce the amount of exposure, keeping the darks, suitably dark. Try dialing in -1 ½ or -1 to start and then adjust to your taste. By reducing the exposure, the brighter areas don’t get blown out and the darker areas are no longer muddy. A simple adjustment makes for a better image.
The great thing about Exposure Compensation is that it is usually built into most all cameras, from a simple point and shoot, through Interchangeable Lens Compacts to DSLRs. Heck, even your smartphone camera probably has this capability. It’s also very fast to do, so you aren’t missing shots looking for complex answers.
So take a simple step to better images and be a happier photographer.
Until next time, peace.


