Shooting great video with your interchangeable lens camera is easy if you know the simple tips to make it work. We will start with the basic settings and then look at some key accessories that will raise the quality and watchability of your project.
Camera Settings
Most all cameras have a video mode. This is different from just pressing the Record button because it gives you some simple controls that make for better video right away.
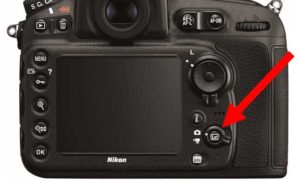
Figure 1 : This image shows the toggle switch on a Nikon camera to go from stills to video.
Resolution
4K is a very popular subject and some cameras can now shoot 4K natively. Think about where you will show your video, because you might find shooting in 4K to be demanding for storage space and very much so when editing. You can most often produce beautiful video with the smaller and easier to use Full HD or what camera makers call 1080p. Choose this setting in your video resolution menu setting.
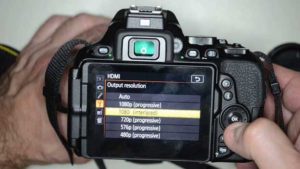
Figure 2 : Setting the video resolution using the camera menu
Frame Rate
Most video today is shot at 30 frames per second. This produces nice smooth movements and doesn’t take up lots of space. Only choose a higher frame rate if you know that you will be using slow motion in your editing process, otherwise choose 30 fps in your menu settings

Figure 3 : Here we can set the resolution and the frame rate all at once
Shutter Speed
Unlike stills, video is fairly demanding in the selection of the best overall shutter speed. Here’s how to make it work for you. Set your camera to Manual mode from an operation perspective when you are going to shoot video. Set your shutter speed to 1 over twice the frame rate. In our example, we chose 30 frames per second, so our shutter speed will be 1/60 of a second. Set it and forget it.
Aperture
In video, aperture is all about the depth of field. If you aren’t sure about the best aperture to use, try this guideline. For wide angle shots choose f/5.6. For angle of view similar to the human eye, and for short telephoto work, choose f/8 and if you are using long telephoto lenses set the aperture to f/11
ISO
In video, ISO acts like the volume control on your stereo. The easiest setting is to set your ISO to AUTO. The camera will move the ISO around to get you a good exposure for the shutter speed and aperture that you have set. This may look like a higher number than you might use for stills, but don’t let that worry you. It’s tougher to see digital noise in a moving video.
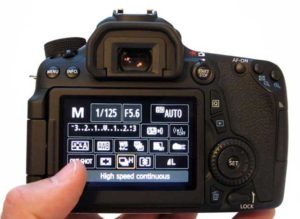
Figure 4 : This image shows a camera in manual mode with settings for shutter speed, aperture and ISO all made in one place. For our example, we would want to set the shutter speed to 1/60
Autofocus
By all means, use the autofocus in your camera. Different cameras respond differently in terms of performance. Some are very quick, some are a bit slower. If your camera is mirrorless, the autofocus performance will likely be quicker than if your camera has a mirror. Some mirrored cameras like some from Canon have a function called dual pixel AF which makes for very fast autofocus in video.
Key Accessories
We are accustomed to some accessories really enhancing our still photography and the same is true for video. Let’s look at three really simple and easy to use ways to make better videos.
Tripod with Pan / Tilt Head
Obviously, we would like a stable platform for our cameras, because even with the stabilization built into most cameras or lenses these days, our body movement becomes evident and the results can be a bit too bouncy. Put your camera on a tripod. Since most TVs and computers are horizontally oriented, shoot your videos in the same orientation. We will often need to pan a camera from side to side or apply an up or down tilt. Pan/tilt heads which are less optimal for stills are perfect for video. If you already have a great tripod with removeable ball head, your most inexpensive route is to get a video head. They are easy to put on and will make for more stable videos and are a lot easier to manipulate for video than a ball head.
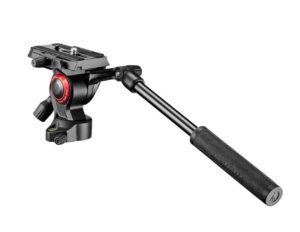
Figure 5 : This Manfrotto BeFree head is fluid damped for SMOOTH movements
Better Sound
Most all cameras have built in microphones, mostly in stereo, to record the audio that is happening when you shoot video. They work but really are not very good and tend to pick up a lot of background noise including your own breathing. A great inexpensive route is to get a shoe mount directional microphone that is dedicated to the task that will plug directly into your camera’s microphone input. This will deactivate the built in microphones and give you much better sound. Most cameras let you have the camera set the audio level, but some let you control it manually. Use whichever mode works best for you. Some cameras even have headphone jacks so you can easily monitor your audio while you are shooting, but don’t sweat it too hard if your camera doesn’t have a headphone jack. Some people like earbuds, others prefer ear covering headphones for better sound isolation. That’s what most pros do.
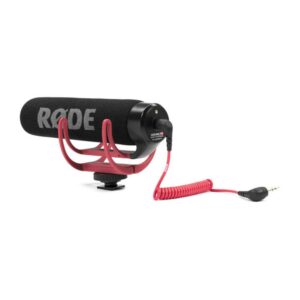
Figure 6m : This RODE Videomic has an excellent microphone capsule and comes complete with a shockmount
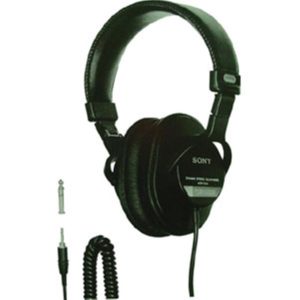
Figure 7 : Over the ear headphones are perfect to isolate audio. If your camera has a headphone jack, these come with the proper sized plug built in.
Better Light and Colour
When we are shooting video outdoors, there’s usually lots of available light to suit our needs, but sometimes we want to supplement it. When we shoot indoors, we should be thinking about adding light to the scene to keep digital noise at bay and to help prevent any weird colour casts. Battery powered LED panels are the answer here. They are very power efficient, put out a lot of light considering their small size, tend to be quite lightweight and don’t get overly hot. You can get them as small as a single LED, or with thousands of LEDs on a panel. Most folks find a mid-sized panel to be a great all-around choice. You can get some with variable colour temperature, but that’s really only needed if you are going to be mixing lots of different light sources.
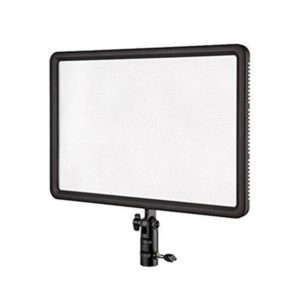
Figure 8 ; This GODOX LED panel is nice and bright and perfect for video. It includes a proper light stand tilter mount and a remote-control unit.
Simple Reflector
Sometimes we don’t need to bring our own light, we just need to redirect the light that is existing. For this, popup reflectors are perfect. They fold up nice and compact for easy travel and then popup and get positioned as you need them. For many folks, it is easiest to get a kit that includes a bracket and a stand to hold the reflector in position.
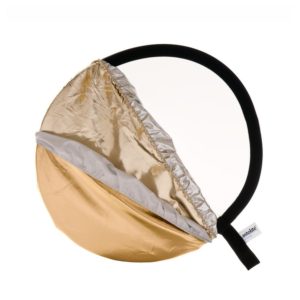
Figure 9 : A handheld collapsible reflector kit with different reflective surfaces
Conclusions
Shooting video is easy on your interchangeable lens camera and you are certain to get better and more professional results than what you will get with a smartphone or tiny action camera.
If you have questions about this subject, please leave a comment on the Henry’s Blog.
