I recently wrote an article providing some explanation and coaching in making successful white balance settings for better images. In this article, I want to share with you recommendations and experiences that have led me to have three specific tools in the bag and why I choose them more often over the remaining pantheon of superb options.
Last statement first. There are LOTS of really excellent tools for photographers and videographers in the marketplace. These three are MY most used and thus my favourites are determined by my own experience and opinion, so the usual “your mileage may vary” caveat applies, as it always should.
In the first two scenarios, you place the tool in the scene for the first shot of the sequence and make an image. Then you put it away until the light changes. That single image becomes your data source for white balance for the rest of the sequence and you will make the settings in your post processing. This works whether you shoot RAW or JPEG, but I still urge you to take a few seconds and set the White Balance setting in your camera to what you think is the dominant light source.
My Three Favourite Colour Balance Tools
Lastolite XPOBalance
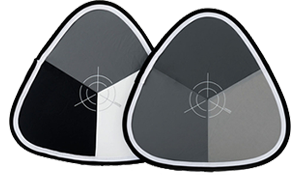
I love this thing. It could not be easier to use. The XPOBalance is a collapsible fabric offering on a steel frame that collapses into a package 1/3 it’s size and into a small blue zip case for transport. This is important because if any tool is cumbersome, it stays at home. Mine is clipped to the camera bag I am using for that shoot with a cheap carabiner so I always have it with me.
One side features three unique neutral grey choices that can be used as click targets for your white balance eyedropper and also as different reflected light targets for exposure adjustment such as one might opt for when considering a bracketed exposure. The other side, the one that I use 98% of the time, has three distinct segments. The one most relevant to getting proper colour balance is the true 18% grey segment. Click on this with the white balance eyedropper in your post processing tool and bang that’s it. Proper white balance in a single click. But if you are like me and also want to maximize your dynamic range use, you also have a true black point and a true white point that can be used in Photoshop with the white and black point eyedropper tools, or even in Lightroom by using the highlight and shadow clipping indicators and the white and black sliders in the Basic panel to set your true white and black points. Of course you can also use the 18% grey segment as your target for a spot metering exercise to prevent your meter from being biased by excess whites or blacks in your scene. If you shoot video, you know you need an accurate white point, and the white segment works for this. Many videographers use manual focus, so the highly visible focus target is super handy in setting your focus points for your video recordings as well. Of course, you can also use the target for stills too.
The XPOBalance goes with me all the time. It’s fast and easy to use. You can order one through your local Henry’s store or on henrys.com. At the time of writing, the product retails for $129.99.
X-Rite Colorchecker Passport
Despite a preponderance to spell colour incorrectly, I carry this little critter with me all the time as well.
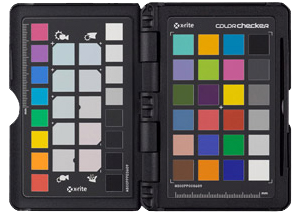
The Colorchecker Passport is a bit more sophisticated in overall capabilities than the XPOBalance but for pure white balance, it’s as simple to use. Following the same process as the XPOBalance, you make one image at the start of your sequence and then pocket the device until the light changes. Pocketing is easy because it fits in your shirt pocket, and also on an included lanyard around your neck. It literally is passport sized, so there’s no reason not to carry it.
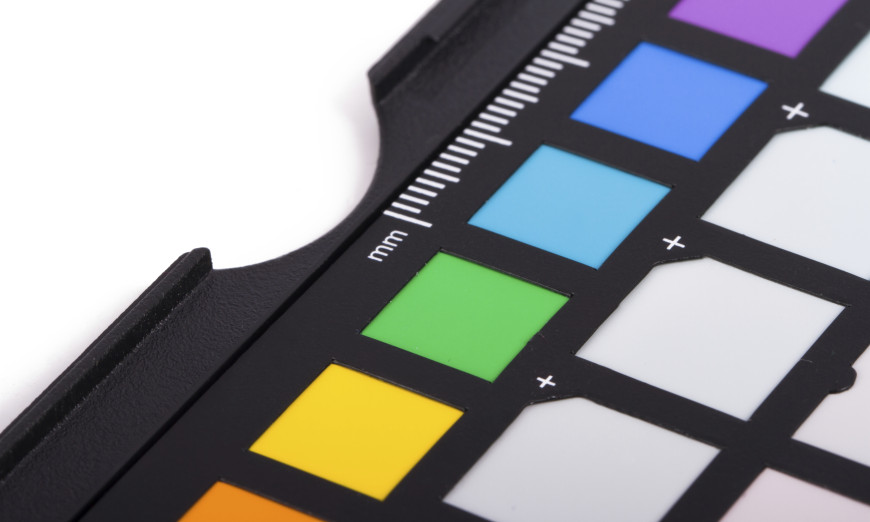
The right hand panel has six exposure steps from black to white, so you can use the white balance eyedropper on the middle greys and in one click get proper white balance. There are also black and white point squares if you use those methods for dynamic range management. On the left panel are tinted grey squares that allow you to set a white balance and simultaneously make it warmer or cooler. Clicking one of the bluish tints adds warmth, one of the pinkish tints cools things down. For those of us who when shooting film carried an assortment of 81 and 82 series filters for skin tone tweaking, this functionality is awesome. There is also an eight step black to white scale and a rainbow for video colour gamut blowout checking.
The Passport comes with software to create custom camera / lens profiles. You shoot a full frame of the Colorchecker in two different light sources, for example daylight and tungsten. Then you use Adobe’s free DNG converter to convert your RAW files to DNG. Then you load both images into the Passport software’s Dual Illuminant routine and the software will create a custom profile for that camera body sensor and that lens that can be applied in post processing to ensure that not only can you set the correct white balance using the eyedropper, you can then also ensure that individual colours are rendered properly. If you do any kind of product shot work, this is critical to ensure that the client’s colour branding is accurate in your images.
If you like the idea of this tool, you can get one from Henry’s in stores or online at a cost of $129.99 at time of writing.
ExpoDisc 2.0
I bought into the Expodisc from Expoimaging years ago. At the time there were two variants, one for neutral white balance and one for portraiture that induced a slight warming effect similar to adding an 81A filter to the lens. Those units have been replaced by the Expodisc 2.0 Professional. It’s a better value overall.
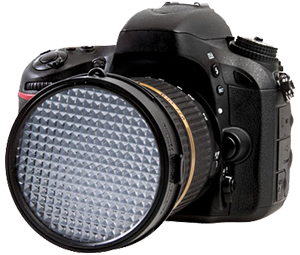
The idea with this product is to make a custom white balance in camera at the time that the image is created, so that what goes to post processing is already correct. Simply place the Expodisc in front of the lens, point AT the light source, take an image and use your camera’s built in custom white balance capability to create a white balance for that shooting sequence that holds up until the lighting changes.
With the V2.0 product, you no longer have to buy a separate Expodisc for warming as the V2.0 product comes with warming gels of various densities in the package. Mounting the new version is also simpler than the original version and has a better mechanism.
Like the other products I recommend, the Expodisc does more than just white balance. You can also use it to turn your camera’s built in reflected light meter into a precision incident light meter. You can also make images that will allow you to create corrections for an entire sequence to remove the effects of sensor dust. While it is always preferable to work with a sensor that is clean, photographers know that sensors gather dust and that built in sensor cleanings are really ineffective. Having a reference image that can be used for spot removal and then being able to synchronize the spot removal across potentially hundreds of images in post processing is a huge advantage.
If this product sounds like it will solve problems for you, it’s available in Henry’s stores and online. It retails at time of writing for $69.99. Please note that the Expodisc 2.0 comes in a variety of diameters and I strongly recommend buying the one that suits the largest front element diameter that you have to deal with. The webcode provided is for the 77mm variant. The manufacturer offers the product in 77mm and 82mm variants as well as a 4 x 5.65 size to use in a standard video mattebox (special order).
Getting the right white balance will make a difference in your work. Having tools in your bag that makes getting the right white balance easy, makes building that differentiation much easier. My purpose in the article is not to be a shill for a product, but to share my personal experiences and opinion on tools that I have found do what I need them to do. Be very assured that I have bought and used many more than these three offerings, some of which were and remain very useful. However, for portability and ease of use, you will not go wrong if you match one of the reviewed offerings to your own use cases.
Until next time, peace.
