As photographers and videographers we are always looking for a new way to present our work that creates differentiation and tells the story in a unique way.
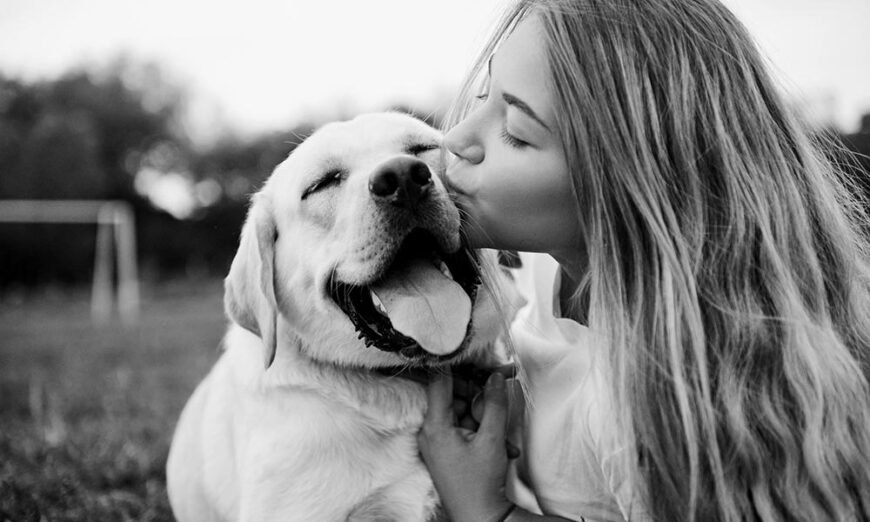
In this article I’m going to go in depth at converting a colour photograph to black and white. This style creates a certain aesthetic that is becoming very desirable for people to have in their homes and is also a very popular method with street photographers.
This is a great affect that can be applied to your photographs straight from your camera, or post-shoot in a photo editing program on any device.
Some of us began photography being inspired by the greats who shot only or predominantly in black and white. Others learn about black and white later in their photographic endeavours. When you start matters less than giving it a try.
The most common route for black and white conversion is to use a plugin or extension to your favourite editing tool. If you’re using Adobde Photoshop or Lightroom, no plugins or extensions are required.
In Photoshop, a black and white filter can easily be applied by going to ‘Image – Adjustments – Black and White’ which brings up a panel that allows you to adjust colours along with hue and saturation. Or you could stick with the default preset as well if you choose.
If you want to understand the “why” of a certain black and white conversion function, we will go a little deeper using Adobe Lightroom as our working platform. It will take a couple more steps than clicking OK on a plugin, but at the end you will know better the how, why and what for rationale in your own conversions, and that I think will be of greater value to you.
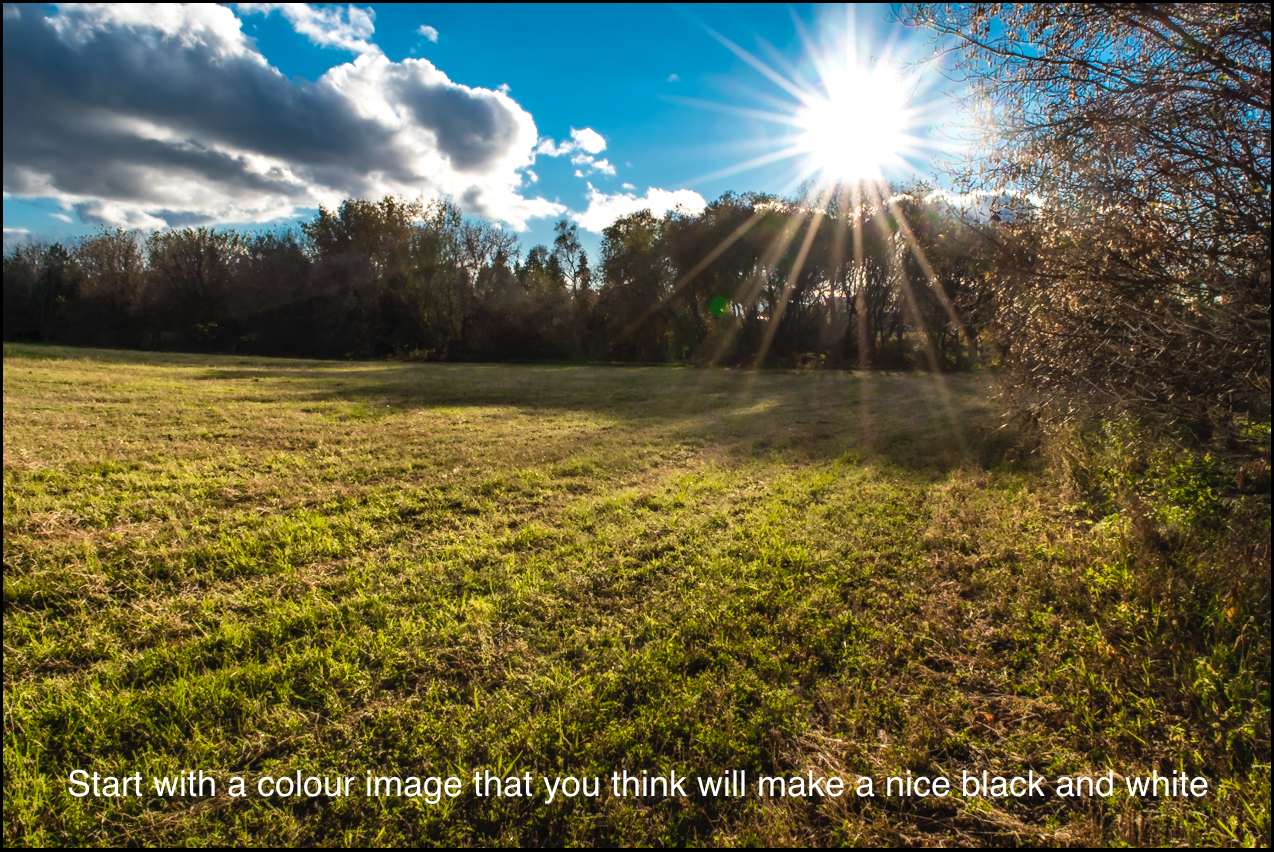
First step, let’s give ourselves a challenge to go make a series of images for the explicit purpose of converting to black and white. Consider this your homework. You want to have 3-4 final images to work from.
Shoot only in RAW and while you can use the Monochrome mode on your camera to see what the B&W image might look like on the back of the camera, you don’t want to be shooting this exercise in JPEG because of the data loss in the initial conversion.
Import your images in Lightroom using your usual method, although if you don’t typically create a Collection for your images at time of import, you might want to consider doing so as it makes things easier later on and because Collections, not Folders, appear in the Navigation panel in the Develop module.
Once you’ve made your selects for conversion, select one image and head over to the Develop module. Right click and make a Virtual Copy. You don’t have to do this, but I like the practice of keeping one unedited version for comparison.
Make your usual edits to the colour version of the virtual copy, with specific attention to the blacks, whites, shadows and highlights sliders to try to maximize your dynamic range by having your histogram fill the window without bashing into the left or right edges.
When you do this, you will see both greys and colours in the histogram. It’s a good idea to note in which areas of the histogram certain colours are the strongest. It helps inform your conversion. Try to avoid making global exposure or contrast changes at this point and stay away from Clarity, Vibrance and Saturation.
Unless the image is really flat, don’t make Tone Curve adjustments and don’t do any Sharpening or Noise Reduction at this point. If you are comfortable using the Lens Corrections module and your camera / lens combination is listed, I recommend using this tool.
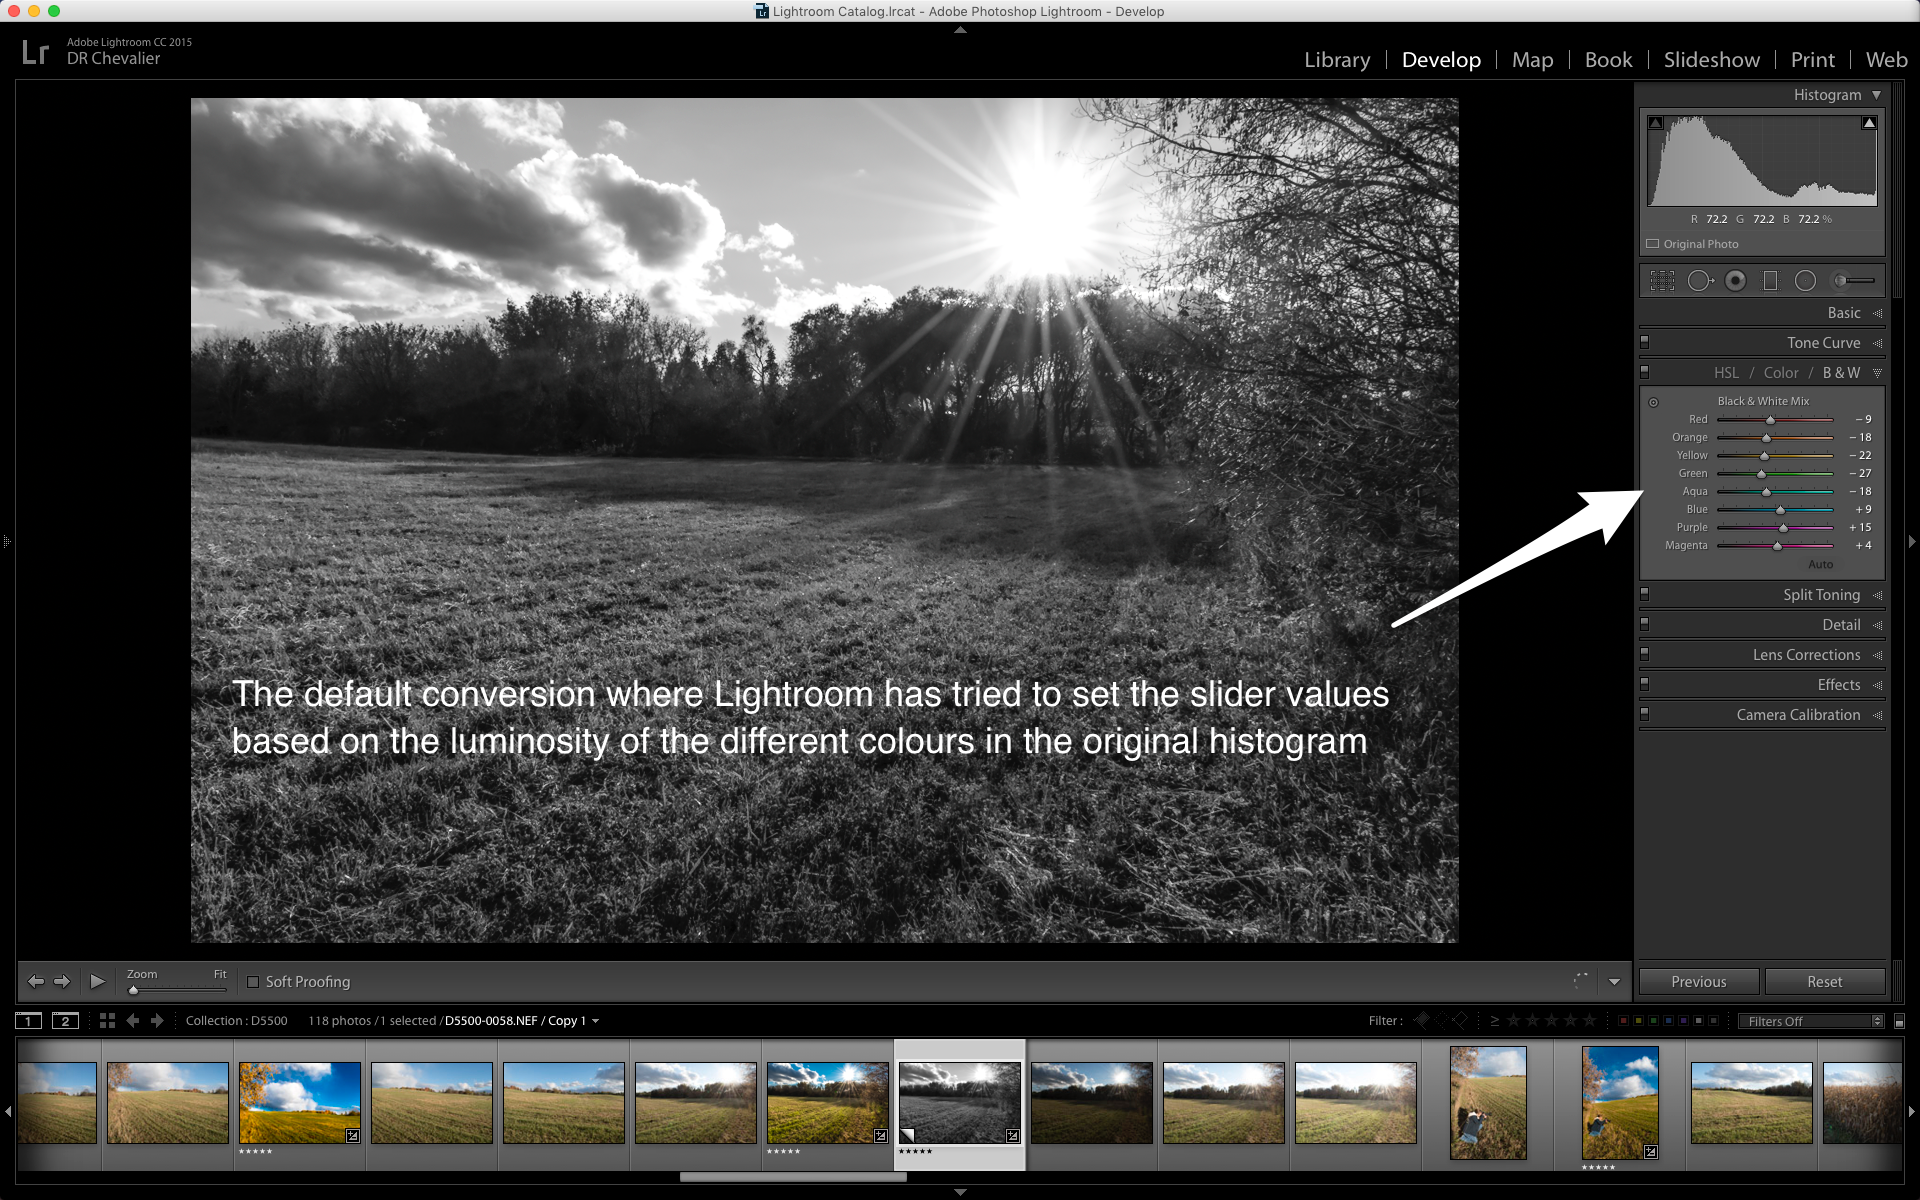
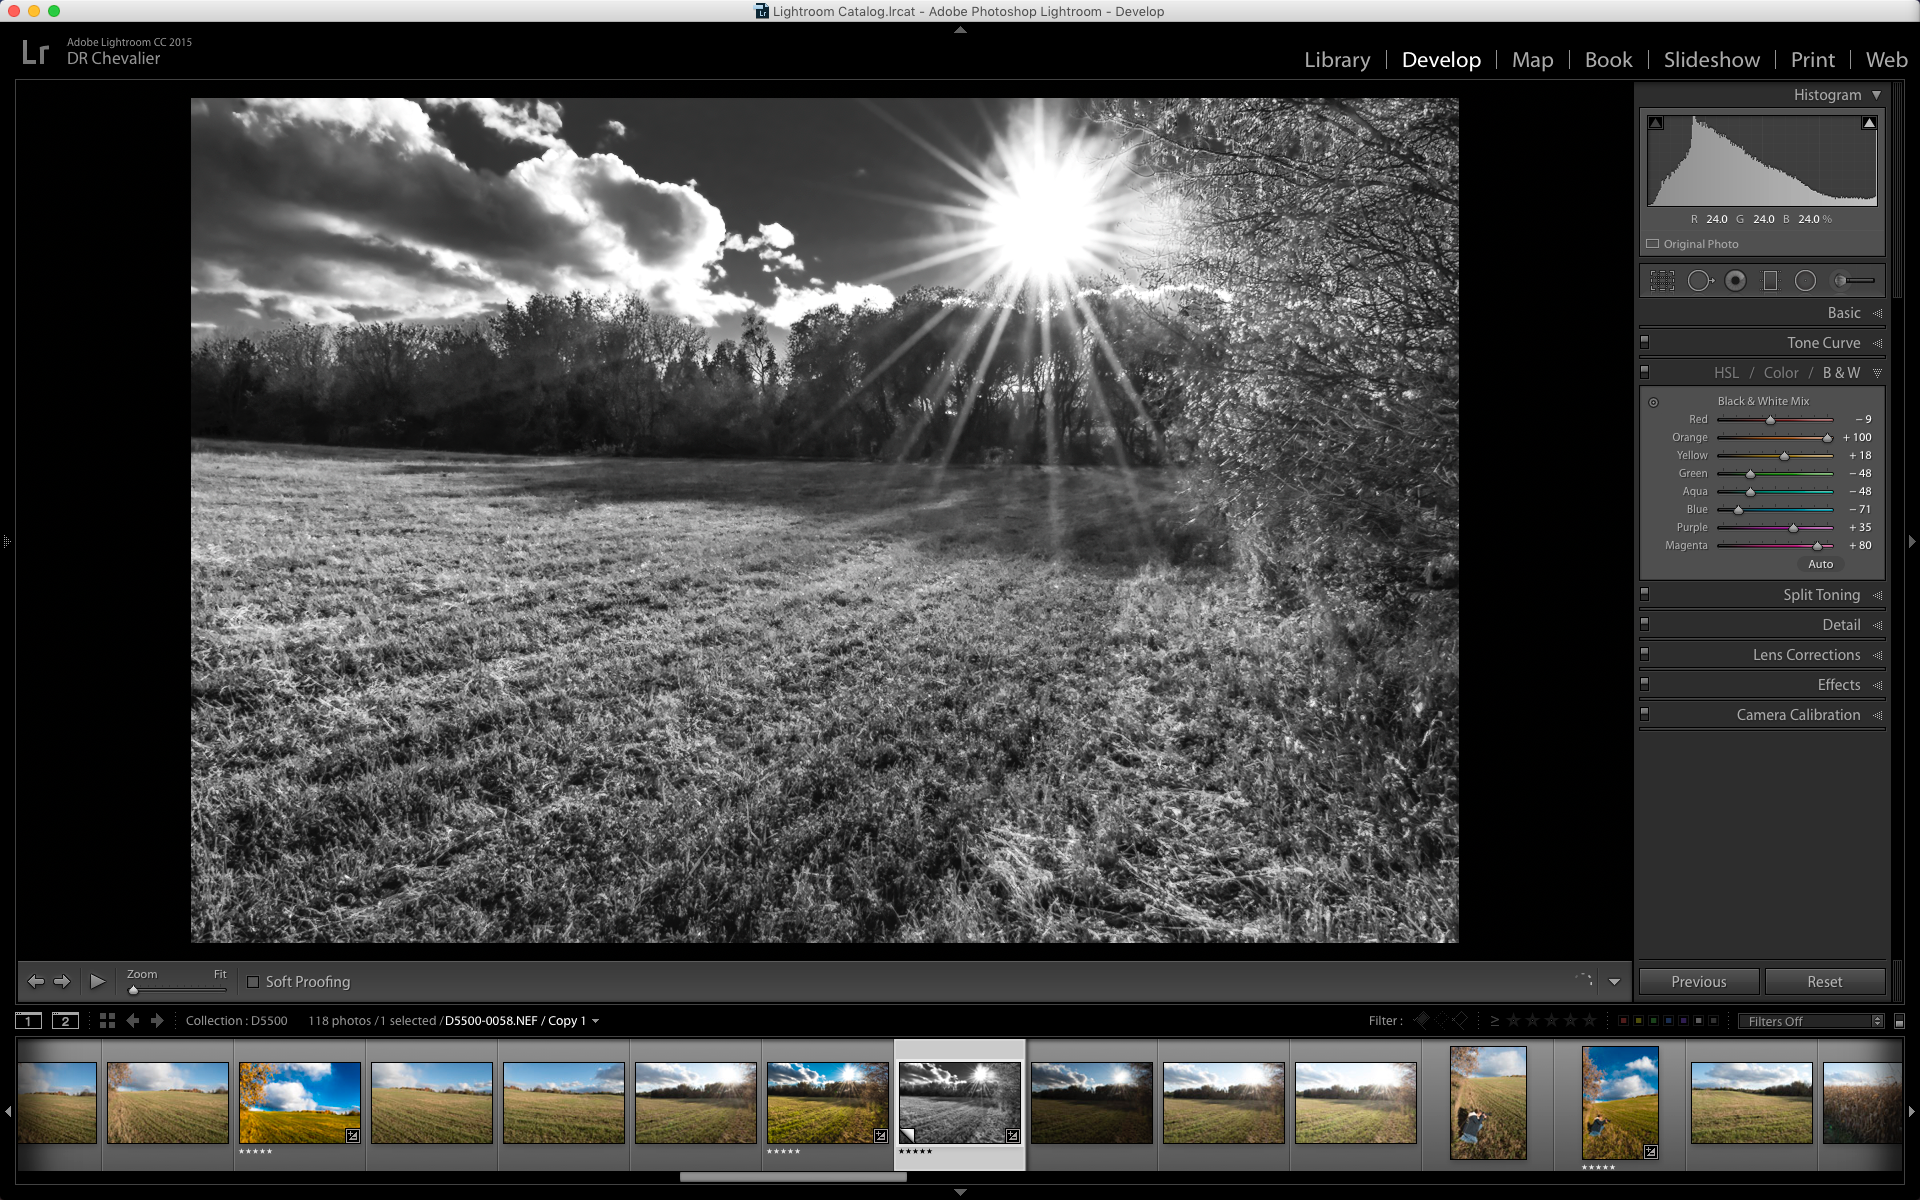
There are multiple ways to convert to Black and White in Lightroom, but I’m going to focus you on one of them, which is in the HSL / Color / B&W panel. Open this panel and with your image selected, click on the B&W indicator. This is your basic black and white conversion. It will look ok, but there is lots left that you can do.
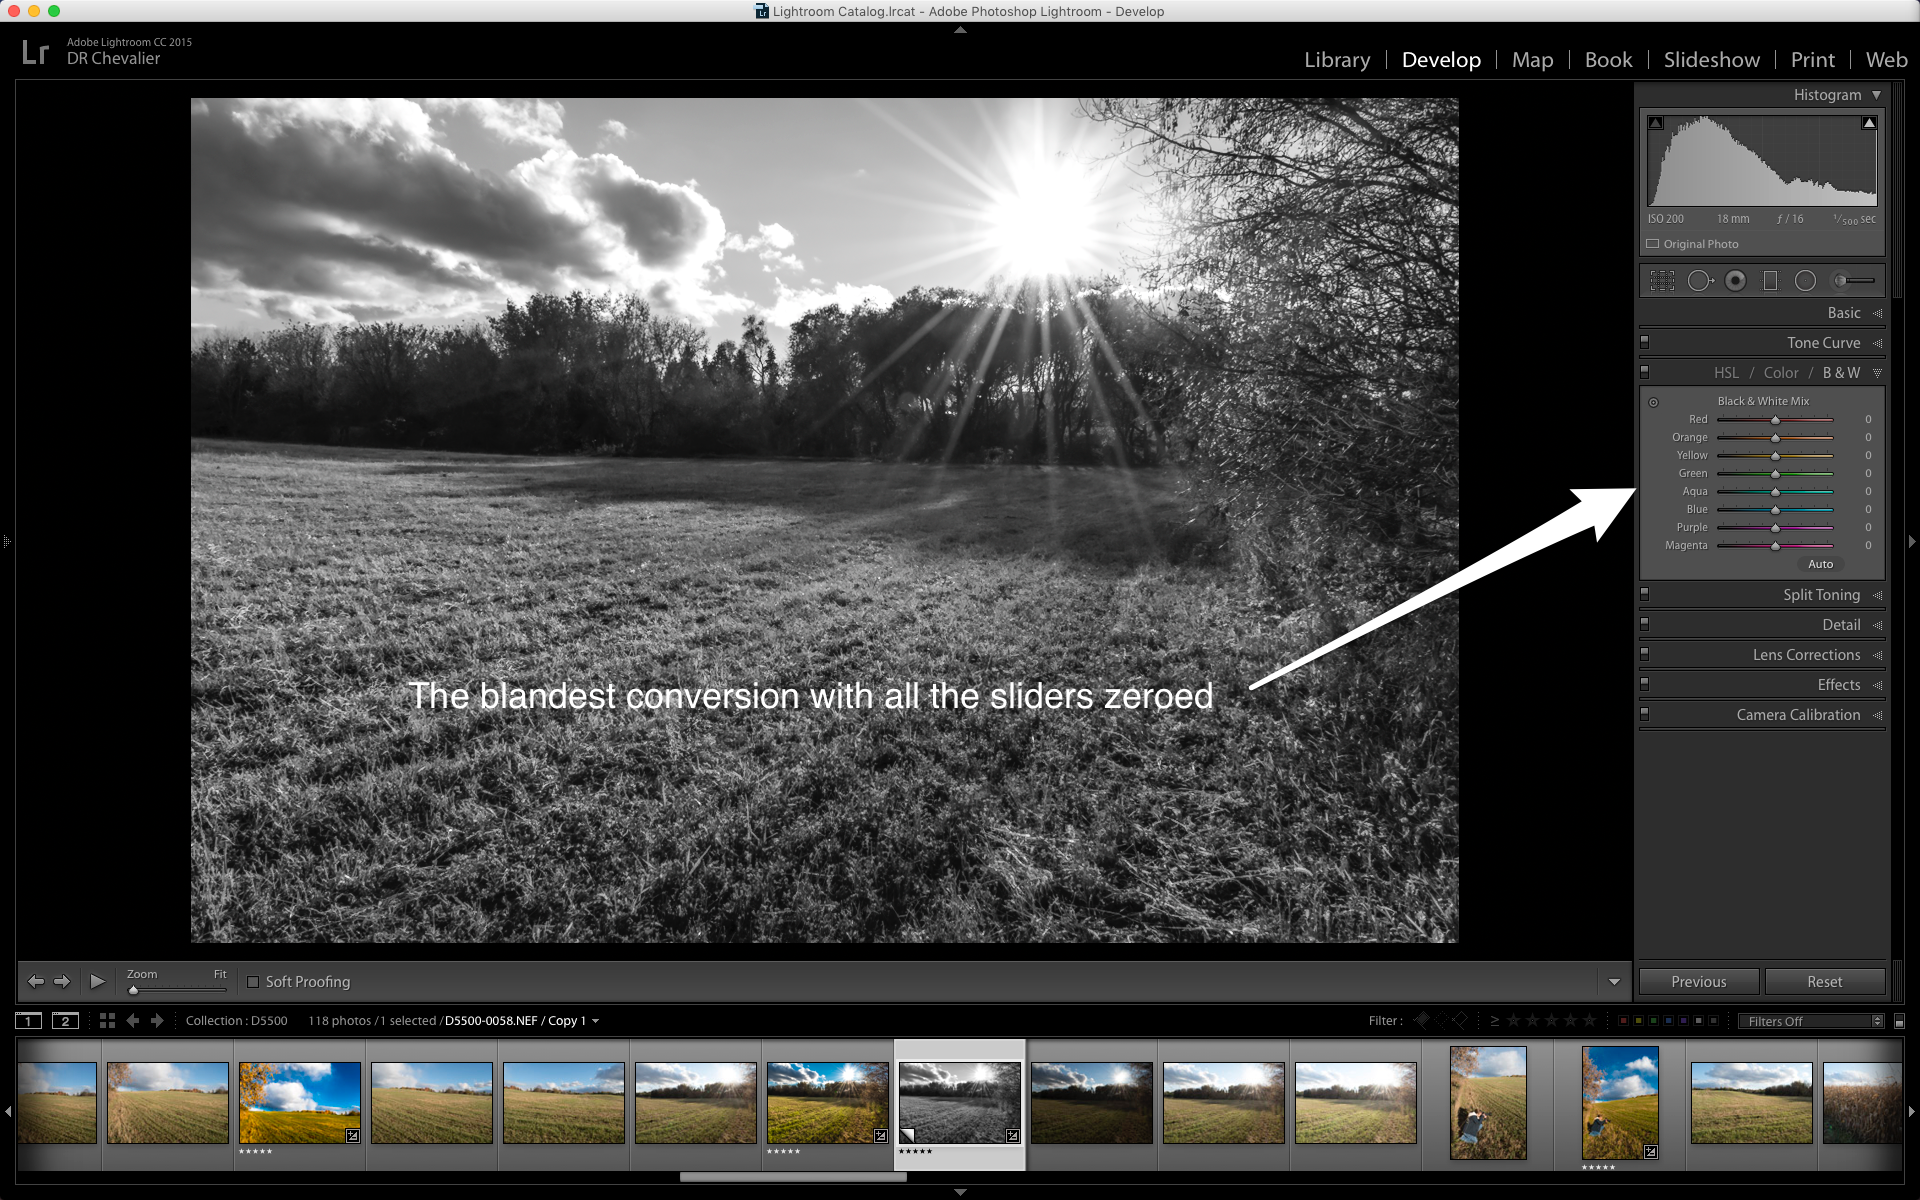
In the panel you will see eight colour sliders; red, orange, yellow, green, aqua, blue, purple and magenta. While it would be lovely if these sliders matched the primary, secondary and tertiary colours, they don’t so we accept this and move on. What you will see is a relative luminance level that is set by the conversion process for each colour. The middle or zero, is no change.
Lightroom will try to make changes during the conversion to deliver a nice conversion. Take a virtual copy of the conversion and on the new copy, zero out all the sliders to the 0 position. The image is less pleasing and much flatter. This virtual copy won’t be used again, so you can delete it, but as it takes virtually no space, you may want to keep it as a comparative version.
Your first conversion shows the settings that you would get if you pressed the AUTO button. Sometimes, these AUTO processes do a decent job but you can usually improve on things yourself.
The reason these sliders are so powerful is that they still control the luminance values of the individual colours, even though the image is now black and white. Many people try to create an alignment with using coloured filters with black and white film. It can be done, but the mechanism is rather obtuse, so this is one place where your knowledge of which colour filter does what with black and white film is not going to be a help to you.
Now, one by one, move the sliders all the way left and all the way right. The red slider will only impact reds or other colours that have a lot of red in them. The same is true for all the other sliders. By manipulating the sliders individually you can control the relative brightness (luminance) of each colour, thereby manipulating the conversion to your artistic desires and goals.
This is an experimental process and there is NO right answer. The setting you like the best is the right one for you. Do this for all the sliders and keep doing it until you get an image that you like. Yes this takes longer than a plugin, but you now know what each change does, and also know how to address a similar challenge in the future.
Once you have the tonal range you like, check your histogram to make sure you haven’t lost a lot of dynamic range and retweak if necessary. At this point, you shouldn’t really need to use a Tone Curve or the sledgehammer of the Contrast slider, but it’s your work, do what you want.
Now, apply your Sharpening and any Noise Reduction needed or desired and you may be finished. I will usually now use some adjustment brushes prior to sharpening and noise reductions, specifically the Dodge and Burn adjustments to selectively darken or lighten certain areas.
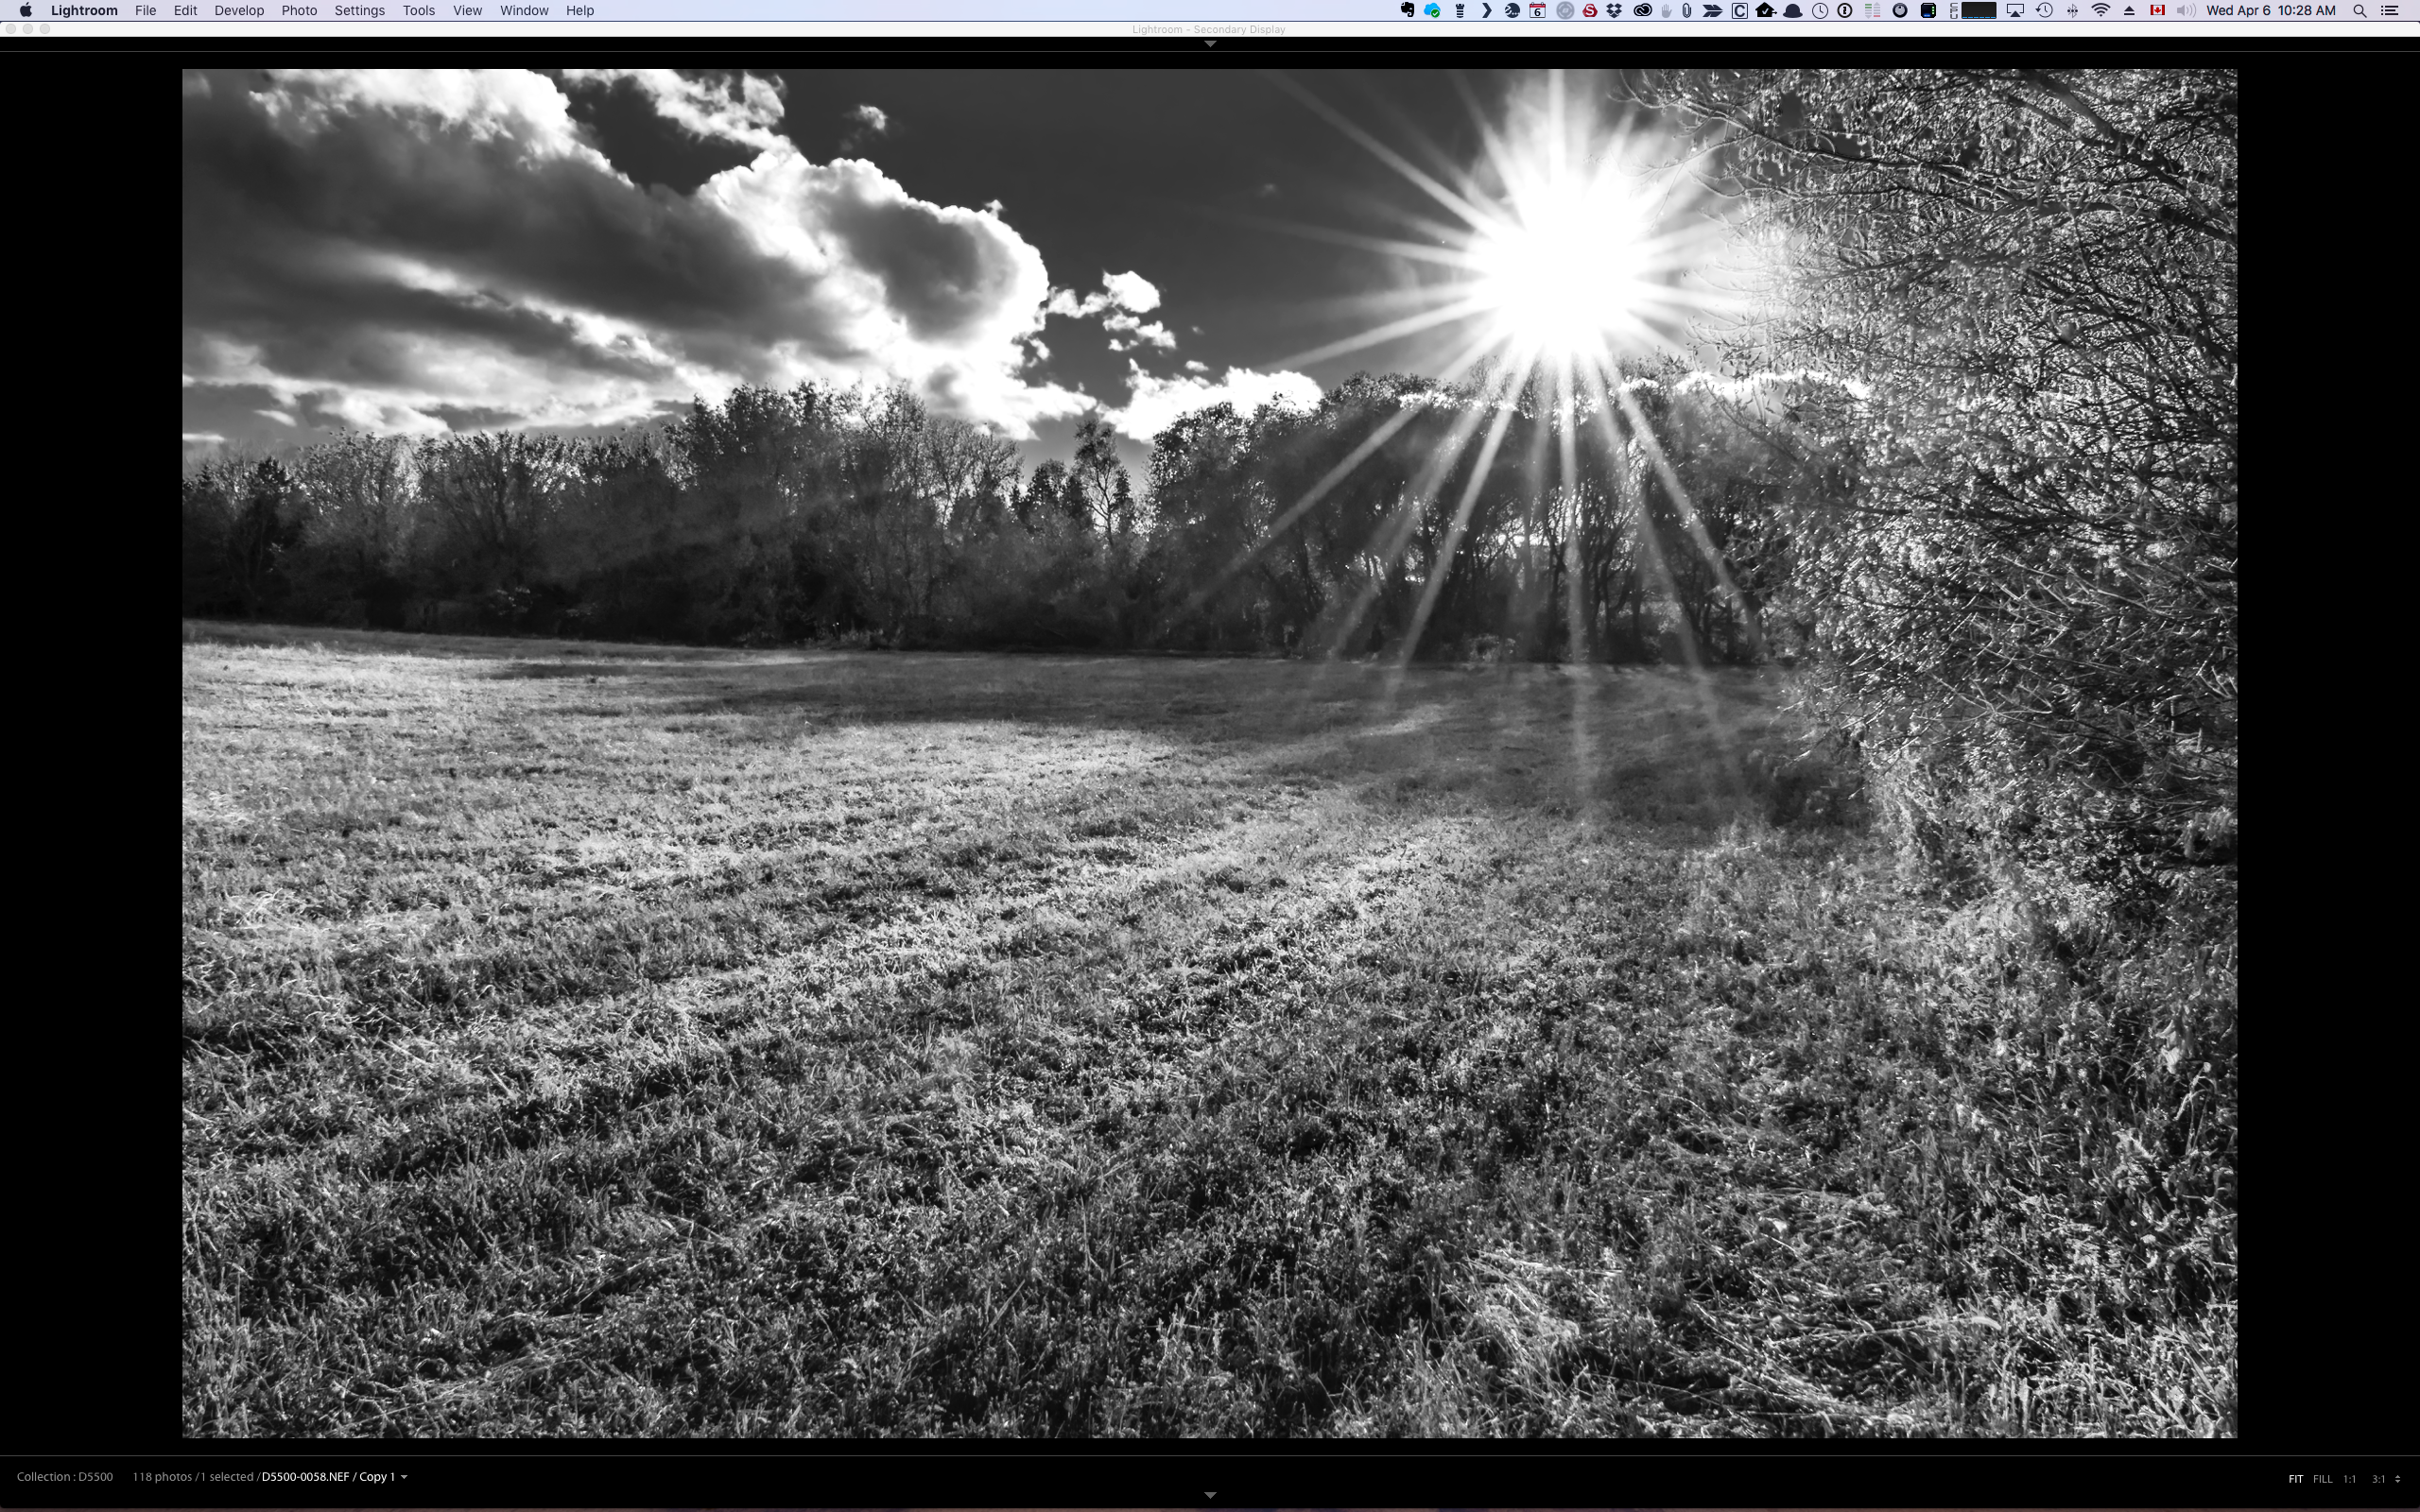
I also prefer to use a Clarity adjustment brush because Clarity is midtone contrast control not extending to the deep blacks or whites and produces, in my opinion, a more pleasing and less stark effect. Here’s the final after all the brushing has been done.
The image was shot with intent to create lens flare in camera, it’s the look I wanted. I was doing an evaluation of the then new Nikon D5500 with its kit lens, and I wanted to prove that what folks got out of the box was a really good system.
Nikon used some of the images from the evaluation for some promotional activity. You don’t need to spend a fortune on gear, nor do you have to install every plugin known to mankind to make really nice black and white images. If you are already using Lightroom, you have everything you need, and once you follow the steps in this article, you’ll not only be able to produce great black and white images, you’ll also know WHY they work the way they do.
Your image is ready for export for posting to wherever it is you post images, or better still is ready to make a print to hang on the wall in your own home.
Until next time, peace.

COMMENT (1)
Pingback: Street Photography Month at Henry's | Henry's Blog