Have you ever browsed through those some of your favourite photo sharing sites and seen those pictures where it looks like the photographer has literally frozen droplets of water in mid air? Sometimes, there’s photographers who specialize in this kind of photography, timing the droplets to hit the water at just the right time. I’m sure you’ve wondered how they do it…
Well, it’s actually not that hard at all. Recently, I got my hands on a product called the Trigger Smart, which is essentially a multipurpose trigger system that can be used for this very purpose. In about twenty minutes, I was up and running with a fairly simple set up, and able to capture some pretty incredible photos, like the one you see about.
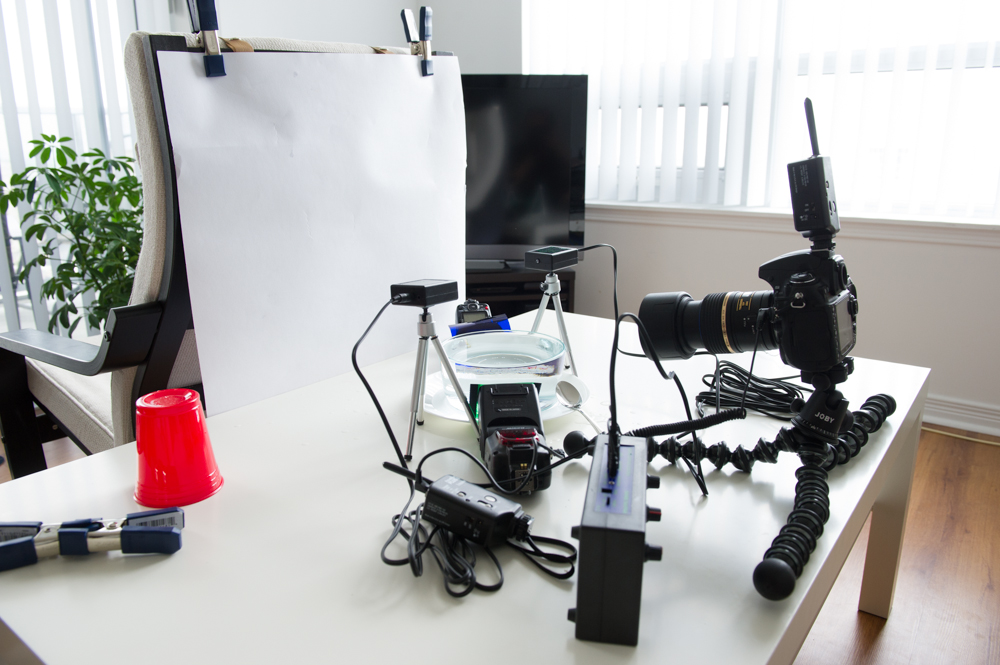
So, here’s an overview of the set up I used…
It doesn’t take a professional set up to take photos like that. As you can see, I did this all on the coffee table in my living room. After setting up a bowl of water (on a plate of course, because spilling is inevitable) I clamped a white background – bristol board in this case – to the back of my chair. From there, all that’s left is to set up the various parts of the Trigger Smart.
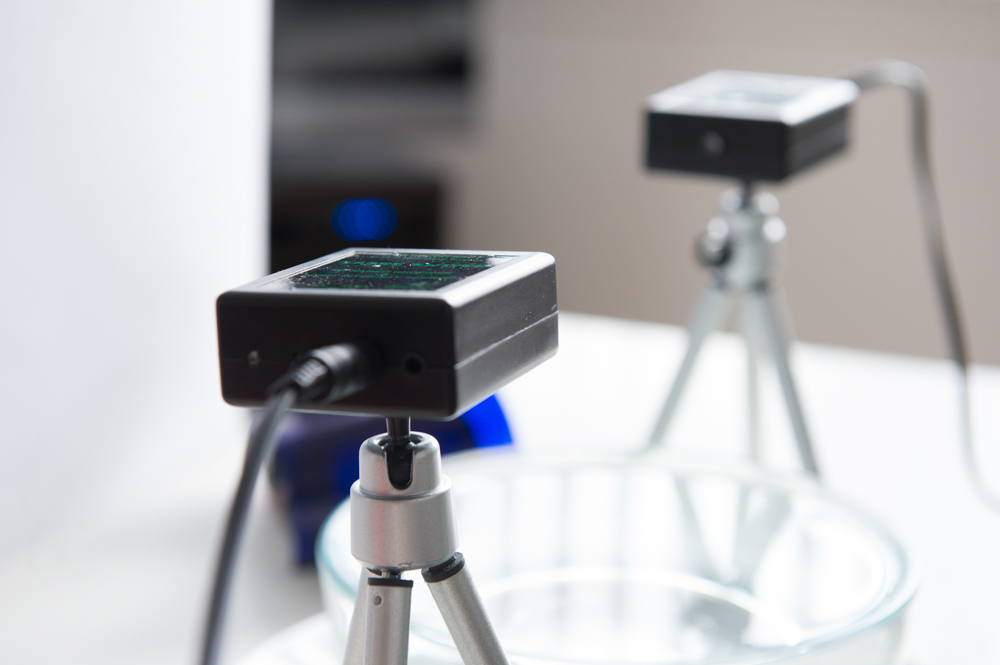
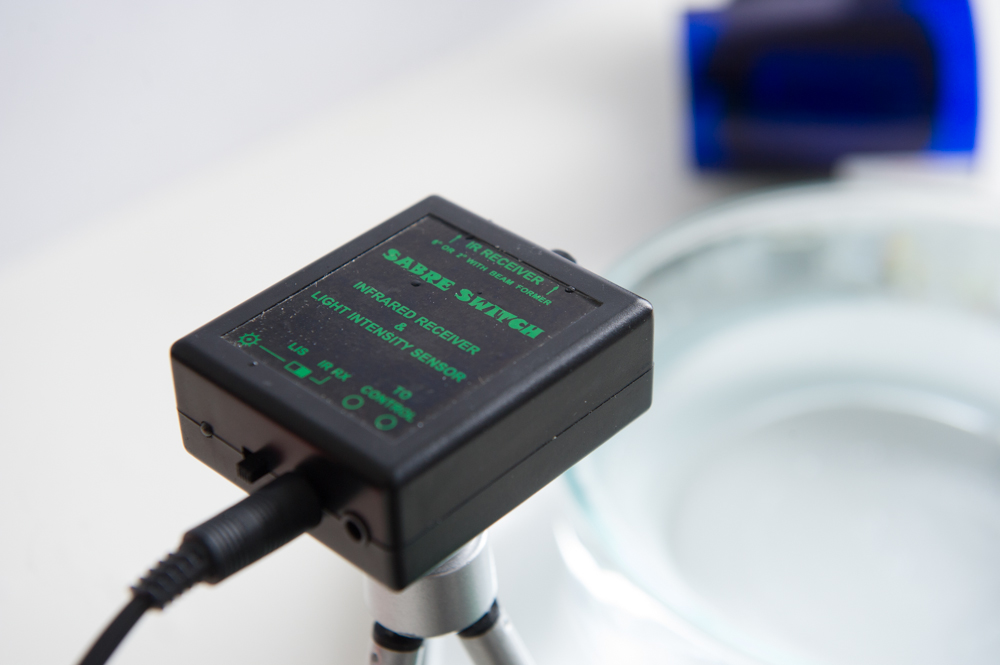
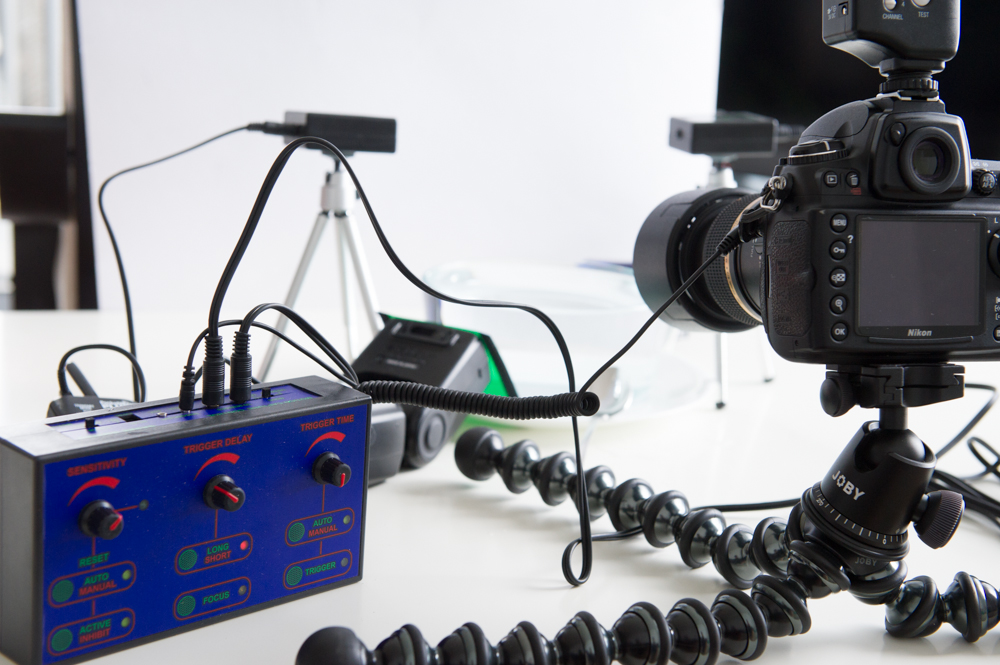
Now, the Trigger Smart isn’t limited to just shooting photos of water droplets. This type of photography makes use of the infrared transmitter and receiver functionality, which creates an invisible beam of light between the two units. When the beam is broken, it communicates this to the main control unit, which in turn tells the camera to trip the shutter.
Alignment is crucial for this part, because one small move could break the beam and the whole system wouldn’t work. Aside from the infrared trigger though, there’s also light intensity and sound triggers. The light intensity trigger works in a very similar fashion to an optical slave. When the unit detects a flash or continuous light at a particular level, just like the infrared method, it tells the camera to take a picture.
Similarly, the sound trigger can be configured to only trip the shutter once audio levels reach a certain level. This is particularly helpful if you want to, for example, take a picture of a balloon bursting. As soon as the burst happens, the Trigger Smart units will tell the camera to take a picture.
So, as I was saying about shooting water droplets… I had my set up together within about twenty minutes. After mounting the infrared transmitter and receiver on their stands, I followed the very simple instructions in the manual to align and calibrate them for sensitivity. I managed to take many pictures of my hands and fingers in the process, but it was all about trial and error.
Once up and running, it’s only a matter of picking a lens, adjusting your camera settings and adding external flashes. I used my trusty Tamron 90mm Macro, a lens I ‘ve used for many ring and detail shots at weddings. Focussing was a bit of a pain at first, but using live view on my D700, and placing an object just under the infrared beam, I was able to get it as close as I could. I chose to trigger my two flashes using a pair of Pocket Wizards – one on the camera, and one connected to a Nikon SB-900. The second flash, an SB-700, was triggered using SU-4 mode, or optical slave mode, but I could have also triggered this flash using a third Pocket Wizard.
From there, I threw a couple of different Honl coloured filters and it’s smooth sailing. I had quite a bit of fun with this, and I really only touched the tip of the iceberg when it comes to what’s possible. But, for twenty minutes worth of set up, and another twenty worth of shooting, I’m quite satisfied with the results.
