Let’s face it. Great video must have great audio because if the audio quality isn’t so great, people typically will not watch the video. With so many people starting or continuing to produce video blogs, aka vlogs, including great audio is not an option, it’s a requirement.
In-Camera Microphones
Here’s another reality. Unless you have a higher end camera with a really good preamp and support for low impedance microphone inputs, you’ve only got the in-camera microphones. And to be accurate, they are lousy. Certainly they record audio. Along with buckets of noise, hum from fluorescent lights, every touch of the camera, creaking of the mount or tripod, and on and on. The noise makes the audio unusable unless you spend days in audio post-production playing with expensive and complex filters, and they still may not fix things.
External Microphones
External microphones are always an improvement, but picking the right one is important. In this article we’ll focus on microphones that are designed for what is often called a one-up, a single person (the talent) who is speaking to the camera or narrating the scene.
Unless you have a dedicated sound person with a very pricey shotgun mic, mounted on a boom and plugged directly into an external recorder, the best way to capture your talent’s audio performance is with a lavalier microphone. A lavalier is unobtrusive, can be highly directional and with a bit of training, can be oriented so as not to pick up noise from rustling clothing or breathing.
The Lavalier System
A lavalier is more than just a microphone. The microphone itself is very small, so for good audio quality, the microphone capsule has to be excellent. With a big microphone, you could get away with some truly bad capsules, but not so in the tiny lavalier. A good lavalier really sounds amazing. A bad one sounds like a car wreck in progress.
The microphone will connect to a transmitter that uses radio to broadcast the microphone signal. This transmitter, often called a body pack, can be clipped to a waistband or stuffed in a pocket. There are systems that connect the body pack by cable to the receiving end, but they’ve been around since Fred Flintstone and prevent the real advantages of a radio system, which is freedom of movement.
The receiver attaches to the camera or to the inputs of a dedicated field recorder. A quality system will either work with high impedance inputs as found on most video cameras, but will also be able to connect to low impedance inputs on higher end cameras and field recorders. One receiver should be able to do both.
The transmitter and receiver should sync together and once this is completed be able to channel hop automatically to find the best available frequency. There are lavalier kits that have only one or two channels and don’t hop. They are less expensive, but considerably less useful. In this case, you do get what you pay for.
The Vlogger or One-Up
In this kind of scenario, you mic the talent, who may be you, secure the transmitter and then connect the receiver to wherever the audio is to be recorded. If recording in the camera itself, plugging in the receiver should disable the internal microphone. If you are the videographer for a show with separate talent, I would suggest using headphones to real-time monitor your audio. If you are doing everything, like many social media entrepreneurs and vloggers have to do, set your levels before recording, and when you are ready, press record and do your thing. A surprising number of cameras with video capability have no headphone jack, which is really bad design, but you often have to live with that.
Why Use a Lavalier Kit
In addition to the superior audio quality, this system allows your talent to move around. Say your vlog is about cooking; you want the talent to be able to move around and continue speaking even when not directly on camera. A lavalier goes with the person and so even if your talent turns away to pull something from the oven, the audio remains intact. Bending, twisting and moving don’t impact the audio, so long as the talent doesn’t turn his or head far away from the microphone.
The lack of a boom overhead or having to remember to only speak when facing the camera also reduces stress on the talent and produces a more natural result. This is key when earning audience trust.
Why Not a Hand-held Microphone?
These used to be super popular, but they tie up one hand of the talent, and have a look that turns a lot of folks off, giving an image to the term “talking head” and not in a good David Byrne kind of way. Hand-helds generally require cables, and wireless hand-helds that don’t sound like a 1950s echo chamber are expensive.
Recommendations
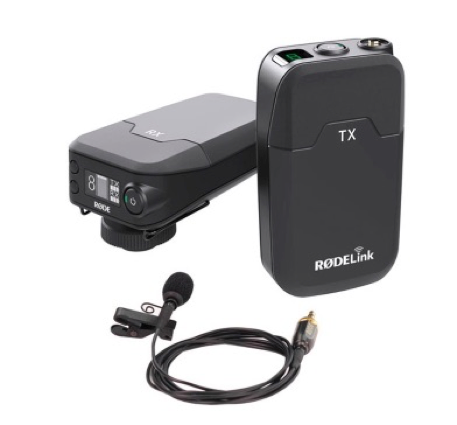
There are some really fine lavalier kits on the market. I am going to recommend the RØDE Filmmaker Kit because it is priced very well considering the quality that it delivers. RØDE capsules are respected for excellent sound and the system just works. The only caveat is that the cases are plastic instead of metal so bouncing them on the floor is not recommended.
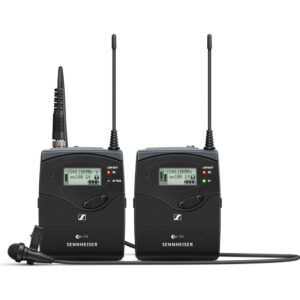
If your situation requires more durability, or you work with talent to whom a lavalier is a new idea and may be prone to being dropped, I would propose the more expensive, and more durable Sennheiser G4 systems. I use these myself in my video work, and they have stood up in the mountains, the desert, pouring rain and with talent who insisted on dropping them several times.

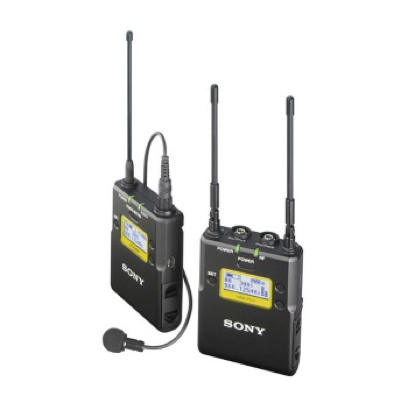
Another system that I really was impressed with, particularly when shooting on Sony cameras with their multi interface shoe is the Sony UWP system. The capsules sound great and when used with a Sony MI shoe, or MI shoe adapter, there is no cable attached to the camera to get in the way. I’ve used these with the appropriate adapters on Sony FS7 and Sony a7R II cameras. They are excellent.
So, as you will have seen, there are options available to you for your vlog or one-up work. They come at different price points so you can make a decision that best fits your use cases. Quality matters, and whether you choose the RØDE, the Sennheiser or the Sony microphone systems, you will not be dissatisfied.
Until next time, peace.


COMMENTS (2)
Pingback: Lighting Your Vlogs | Henry's Blog
Pingback: How to Stabilize Your Camera for Vlogging | Photography and video news, reviews and tips | Henry's Camera