What is TTL Flash?
When we make images using available light, we set the exposure according to what the camera meter advises us. This happens regardless of the mode that we shoot in. While some modes allow more overriding of the proposed settings, in most cases, the camera meter reading is our initial point.
Bring up the topic of TTL flash however, and you have the makings of a heated debate, with some advocating only TTL and some advocating only Manual flash. Fighting over this topic is really a waste of time. Both work, but for many folks, TTL is both faster and more reliable.
TTL flash is EXACTLY the same as TTL available light metering except that it meters the flash exposure and may or may not include the available light as part of the process. If we are so willing to trust TTL available light as a starting point, why not TTL flash?
How It Works
When we use our camera and flash together in TTL flash mode, the combination will typically use a small pre-flash prior to the actual exposure to act as a guide for the actual flash output.
Flash output doesn’t vary, but flash duration does and TTL flash is designed to turn off the flash when a proper exposure is achieved. This happens differently from ambient light because flash duration is typically far less than the shutter open time. For example, a camera shooting at the common flash synchronization speed of 1/200 of a second may experience a total flash duration of only 1/1900 of a second. This means that the flash has ceased firing long before the shutter has closed.
Many internet sites and videos reference turning the power down on a Manual flash as being impossible on a TTL flash. This is completely incorrect. Both Manual and TTL flash manage duration of the flash pop, not the power output of the flash. Manufacturers use terms like power control because it is allegedly easier to understand, even though the terminology is imprecise.

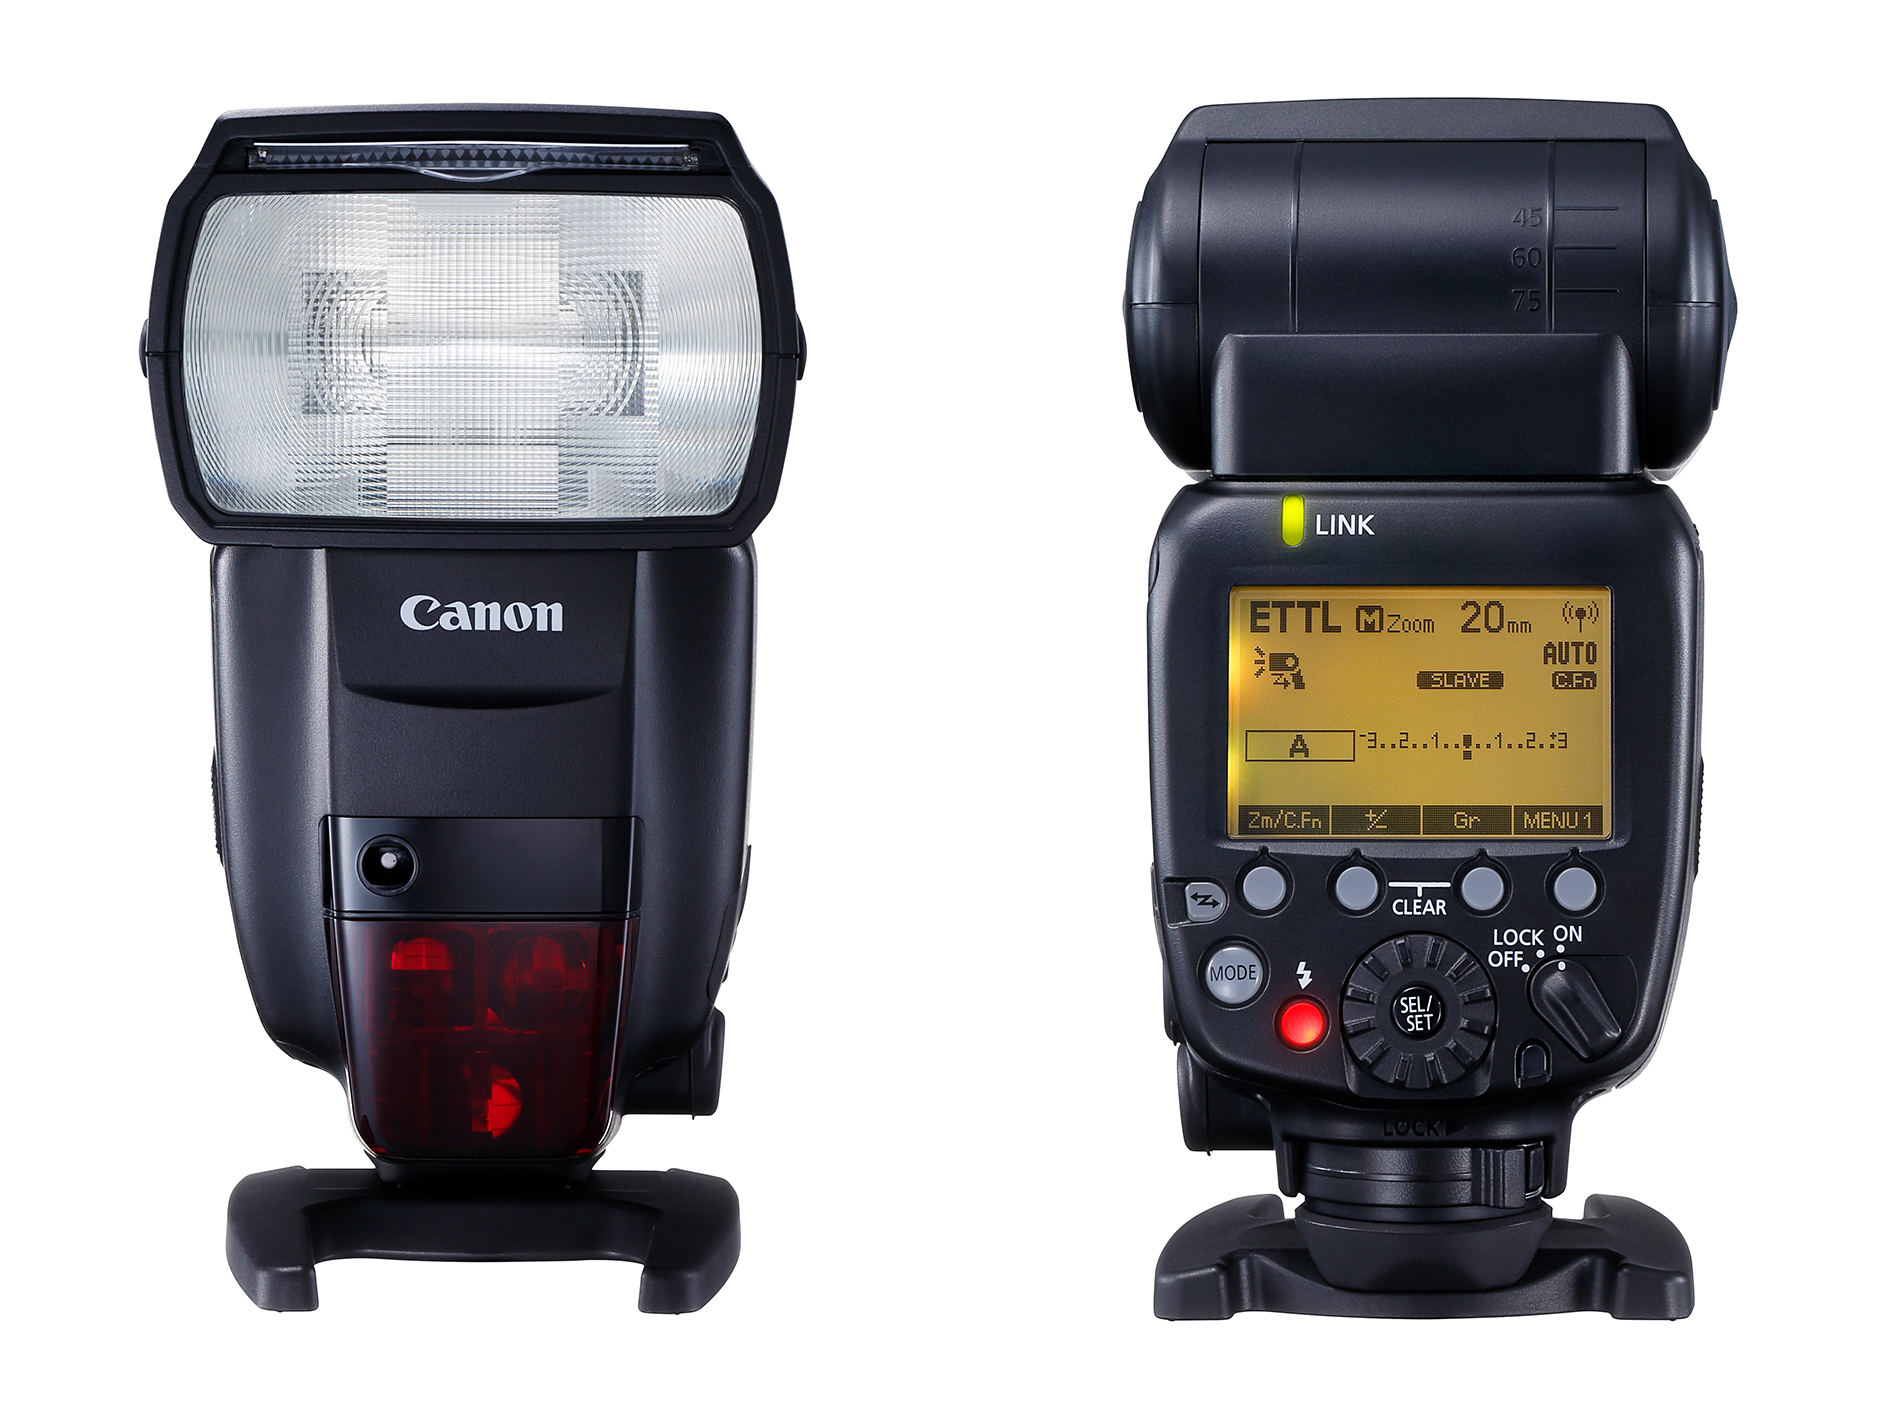
Figure 1: Example with Canon 600EX II-RT shows E-TTL. Image Source: Canon Canada
In a TTL flash shot, we prepare our exposure and composition. We focus and squeeze the shutter release. The flash will execute a very quick pre-flash before the shutter opens, measuring (on the metering sensor) the return exposure for the pre-flash output. The shutter opens and the flash fires based on the pre-flash, but the actual power cut happens in real time between the camera and the flash. The shutter closes, and our exposure is complete.
A Manual flash works the same way, but no exposure metering of the flash takes place, so your flash exposure could be way off. With TTL it’s going to be on target, or very close.
Adjusting Exposure with TTL Flash
When we shoot only with available light, in any of the Program, Shutter Priority or Aperture Priority modes, we can increase or decrease the brightness for the subject using the Exposure Compensation function. This is so much faster than doing everything in Manual mode. In every Camera 101 class that I have taught, for literally decades, this one feature interests and enthuses the most people. You choose to brighten (add exposure) or darken (remove exposure) based on your personal goals. It works beautifully, and it is very fast.
When we shoot with TTL flash we can do exactly the same thing, using the Flash Exposure Compensation function. If your camera supports TTL flash (and most do today), it also supports Flash Exposure Compensation. On some cameras this option is buried in the menu system, on other cameras it is a dial or button/dial combination. You can often also make these settings on the flash itself. The concept and the execution of Flash Exposure Compensation is, for the most part, as easy and as fast as Exposure Compensation for ambient light.
TTL with Off-Camera Flash
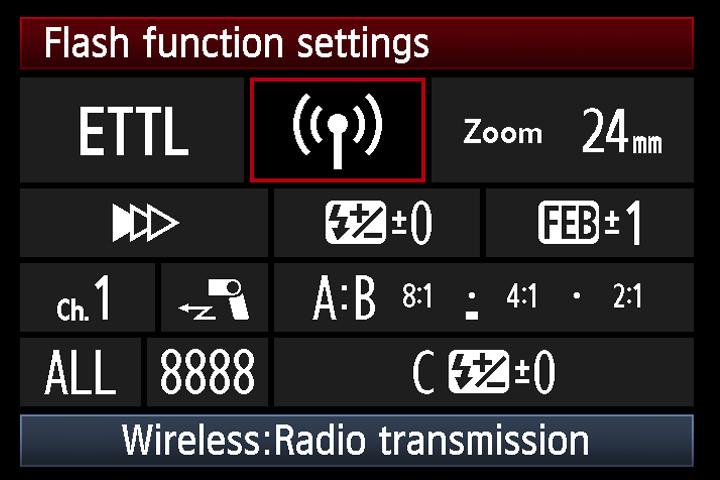
The real elegance of TTL flash happens when you get the flash off-camera and even further when you start to add more flashes. In a purely Manual flash mode, you must physically visit each flash to change its settings. When that flash is farther away, or perhaps up high, this is a real pain. Most manufacturers allow you to use the built-in pop-up flash or a hot shoe mounted flash as the controller for your off-camera flashes. This means that you can change the output duration of the remote flashes from the camera position, often from within the camera menu options themselves. Some manufacturers offer automatic group lighting ratios right in the camera so if you want a lovely 4:1 lighting ratio, you only need select it in camera and identify which flash or flash group is your key and which flash or flash group is your fill.

Figure 2: Canon example of in camera TTL flash control including groups and ratios. Image Source: Canon Europe
Higher end cameras and flashes, as well as separate radio control systems, provide the same functionality at greater distance and beyond line of sight between camera and flash. This is awesome but not critical for most flash photographers, since a great deal of off-camera flash is done inside where the default optical signalling works like a charm.
Setting Up
Set your flash mode to TTL when you have it on your camera. Compose as you normally would and shoot. Check your shot. Use Flash Exposure Compensation to adjust brightness if necessary. That’s it. If your flash has a bounce, swivel head or is using some kind of light shaper, TTL flash metering will automatically take that into account.
If you are shooting with your flash off-camera, you will typically set your pop-up flash to Commander or controller mode. It will still appear to flash but it is not contributing to the exposure, just talking to the other flashes. Set your off-camera flash to Remote mode in accordance with your flash documentation. TTL flash as well as Flash Exposure Compensation work exactly the same way when the flash is on camera. It really could not get any simpler.
If you have more than one off-camera flash, put each of them in a separate group so that you can control each one independently, directly from the camera. In this way, you can control the flash duration and effective output for each flash without affecting others.
The One Caveat
We may need to use Exposure Compensation for some available light photographs because the meter may produce an exposure that isn’t optimal, if the subject is predominantly bright or predominantly dark. The same thing applies to TTL flash, but in this situation, you will use Flash Exposure Compensation to bring your flash exposure in line with your goals.
Just as you may use Auto Exposure Bracketing for available light photography, you can also use Flash Exposure Bracketing for TTL flash photography. Most camera/flash combinations that support TTL also support Flash Exposure Bracketing.
Go Make Some Shots
To use TTL flash, both your camera AND your flash must support TTL and every maker uses their own protocol for TTL signalling. Fortunately, the OEMs all make TTL flashes and there are some excellent third party TTL flashes out there for all kinds of different cameras. TTL flash is like any other photographic exercise, proper practice is the mother of skill. You will get amazing flash images, if only you invest in the right flash for your needs, and practice with it.
How it Works


