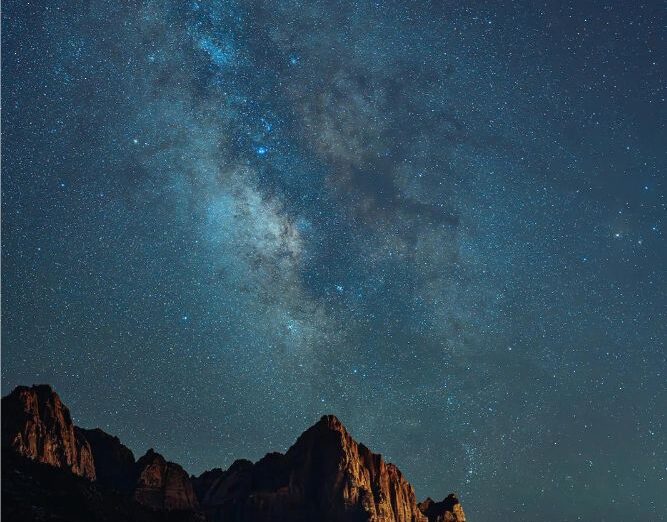
Matt Matkin (@matt_matkin) is a visual storyteller who recently moved across to the US to land a dream job as a video producer. “I’ve always had a passion for videography and photography. I always considered myself a videographer over a photographer yet, my love for photography has grown so much that I think I’m taking more photos than videos these days. There’s magic to capturing a moment in time where everything lines up perfectly and you get the shot you had in mind, I can’t think of a better feeling. But my favorite part of photography has to be the story behind the shots. Sharing my photos with friends and family and explaining how I got them is always the best part for me.” We saw this Milky Way image created and we wanted to learn more about how Matkin created it, so we asked. Below, he shares the story behind the shot in his own words.
Product Preview:
In This Article You’ll Find:
Sony Alpha 7R V
Sony 35mm f/1.4 G Master
Sony 14mm f/1.8 G Master
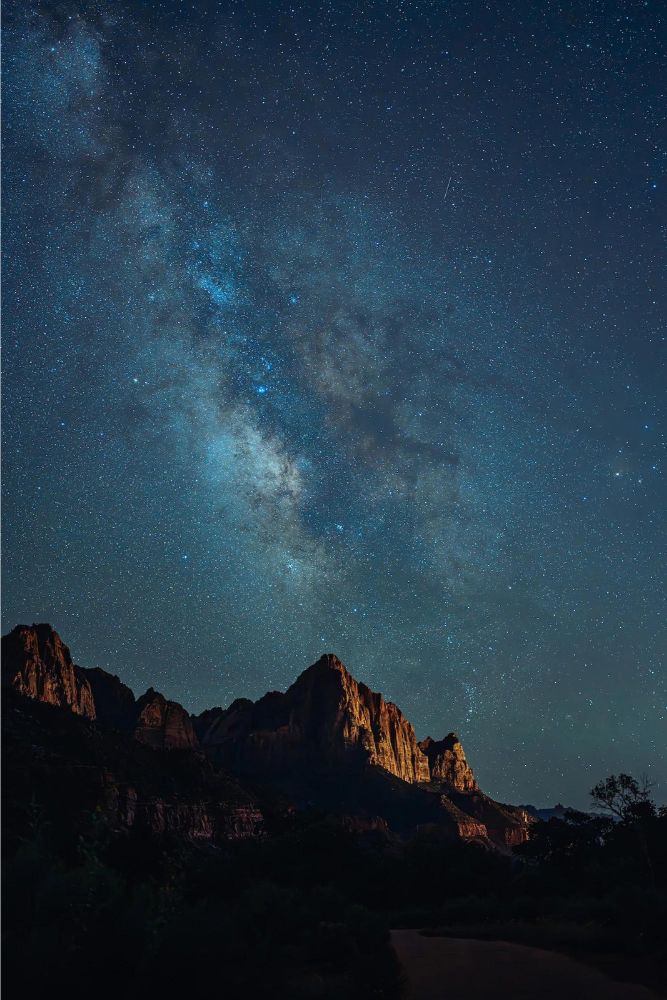
Photo by Matt Matkin. Sony Alpha 7R V. Sony 35mm f/1.4 G Master. 8-sec., f/1.4, ISO 3200
Scouting Your Composition
For this shot, Matt Zefi, my colleague, and I were producing a landscape and astrophotography video series. We knew that Zion would be the perfect place to capture the shots we needed for landscapes. And thanks to it being a new moon, it was the perfect time for us to get the darkest skies for astrophotography. Having shot the Watchman at sunset for a video we checked the PhotoPills app and saw that the Milky Way would pass perfectly over the Watchman, albeit at 4 a.m., but it was too good of an opportunity to miss.
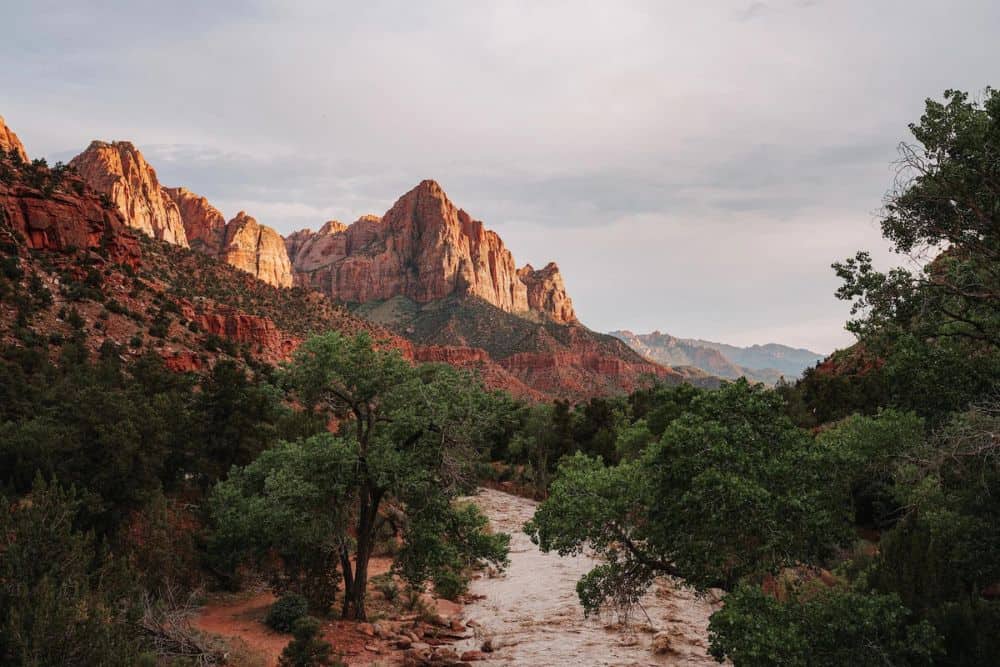
Photo by Matt Matkin. Sony Alpha 7R V. Sony 35mm f/1.4 G Master. 1/125-sec., f/8, ISO 320
During blue hour we scouted for the best shot. We found it on the trail with the path creating a leading line towards the Watchman. Having found the composition I liked, it was then a waiting game. Everything was closed before we headed out, so fueled with a not-so-great midnight sandwich packed from 7/11, we set ourselves in for the night.
Patience & Persistence
As we were waiting it got to about 1:30 a.m. and we noticed a fair few clouds coming in. Being new to astrophotography I naively thought “Oh we’ll be fine, let’s hang on a little while longer” but at around 2-ish we both knew we were fighting a losing battle. Begrudgingly we had to call it and knew that we weren’t getting the shot that night.
I have so much admiration for astrophotographers, the patience required, not only to wait to get the shot, but to know when to call it after investing hours is a great skill to have. Having checked the weather in detail the following morning and knowing where the best spot was, we headed out the next evening with higher hopes, confident we’d get the shot.
Two Sharp Primes That Shine At Night
Gear wise I was using the Sony Alpha 7R V, which is just an unbelievable camera. As someone who geeks out over anything gear-related, it’s just incredible. If someone said to me six months ago you’d be working in Zion National Park shooting the Milky Way with some of the best equipment on the market I would have said “Yeah alright mate next joke.” I still can’t get over how fortunate I am.

Photo by Matt Matkin. Sony Alpha 7R V. Sony 14mm f/1.8 G Master. 10-sec., f/1.8, ISO 4000
I was swapping between the Sony 35mm f/1.4 G Master lens and the Sony 14mm f/1.8 G Master, both incredible lenses with amazing low-light performance, which when shooting in the pitch black, is really, really important. I decided to go with the Sony 35mm as I liked how the Watchman was filling more of the frame in the composition. Also, the wider aperture from 1.8 to 1.4 was very helpful.
I was taking a lot of frames to keep track of the Milky Way’s movement and knew that the perfect shot would be when it lined up in the middle of the two peaks of the mountain. With the 35mm, the Milky Way and that gap seemed to be matching in size. I was buzzing with excitement and couldn’t get over how incredible the whole situation was and how lucky I am to call this work.
Seeing the Galaxy come over the mountain slowly I couldn’t believe what I was seeing it was practically toying with me at this point. When they lined up I took the shot and didn’t blink until I could look at it on the screen. Instead of eloquently expressing how happy and excited I was to Matt, I just let out a “maaaaaaaaate” as I couldn’t believe how amazing it looked.
Camera Settings: Trial & Error
In terms of settings, again this was a whole new world for me. This was my first ever time shooting astrophotography so there was a lot of trial and error to get it right. But seeing the stars on the back of the camera for the first time my mind was blown, I was hooked instantly. I learned quickly that white balance was key for astrophotography and experimented between 3000-4000 kelvin until I found the sky looking the perfect blue. Everything in astrophotography is so intentional and makes you slow down your whole process.
It’s very therapeutic, just being outside in nature with no one around and being able to see so many stars is an incredible experience. I experimented with my shutter speed between 5-10 seconds and found that eight seconds was the longest I could go without the stars starting to trail.
Using manual focus was so important and having the camera punch in while you are doing it to make sure you can see what is in focus is such an incredible tool to have. I put my ISO up to 3200, any more and I would have been introducing too much noise. But you can really push the Alpha 7R V. It’s a real workhorse and can handle whatever you throw at it. Also having the camera on a self-timer on my tripod was key as I didn’t want to add any movement from hitting the shutter button. Adding that two-second timer in camera gave it time to be completely still on the tripod.
In terms of lighting, I didn’t add anything to the scene. I’m still not quite sure what light pollution was hitting the side of the Watchman, but I am so grateful to it as the depth it adds to the image is amazing. I didn’t want to add any other light as there were a couple of people in the general area who were also shooting and I didn’t want to add any unwanted light to their photos.
The Edit
I was shooting in uncompressed RAW files to get as much information as possible from the camera as I knew there would be a bit of editing to do on the image. I put the photo into Lightroom CC and raised the shadows and exposure to bring back as much detail in the shot without it looking over-edited. I wanted to leave the foreground in a fair bit of darkness, drawing the eye into the mountain and the stars straight away.
I then put the photo through Lightroom’s new Noise Reduction software which is an amazing tool for photographers to have in their arsenal. I’m amazed at how it was able to keep so much detail in the sky and not take anything away from the image. After that, I created a few radial masks, raising the shadows and contrast on the Milky Way to make it pop. I also bumped up the shadows slightly on the lit side of the Watchman using an object mask.
But having spent a few hours at the location I was able to dial in my settings to get the majority of the result I wanted in camera. Usually, I like editing warmer tones into my images but as this was a whole new world for me I switched it up and leaned into the blues as it just looked so vibrant.I was so excited to share this that I edited this in the car on the way back from the shoot, very sleep deprived at 5 a.m. going through the windy roads of Zion.
Everything about astrophotography made me rethink how I approach photography and I have taken away the idea to be more thoughtful with how I shoot all my photos from now on. For me, although the actual shot of this is probably my favorite photo that I’ve taken, the story behind this is so much better. This was my first work trip for my genuine dream job. I got to use equipment that younger me would have dreamed to use, in one of the most beautiful places I’ve visited, with the conditions lining up perfectly. It was one of those pinch-me moments in life that I don’t know how I got there, but I’ll be forever grateful for.
See more of Matt Matkin’s work on Instagram (@matt_matkin).
This article was originally featured on Sony’s Alpha Universe website on July 4, 2023. Click here to view the original article.
