
The world of close up photography is something that I had always wanted to explore. The semi surreal kind of shots that you can get with a macro lens or by adding extension tubes can be quite beautiful.
As with anything else you photograph, light is an important element to consider. If you’ve been following this blog you know that my primary interest is in photographing people, mostly with studio strobes. Commercial photographers that make a living photographing various products typically do use strobes for their work. These arrangements are usually a sophisticated layout with various lighting modifiers and lights used together, in addition to special product photography tools like flags and gobos. The result is usually a meticulously lit subject where the light was shaped and crafted with care.
If your ambition is to create clean and well lit product photos (perhaps for selling products on a website) you don’t necessarily need to invest in a strobe system for this purpose. To understand how you can achieve great results with a very simple setup, we need to remind ourselves of a simple concept in lighting that is relevant. The concept is the difference between hard and soft light.
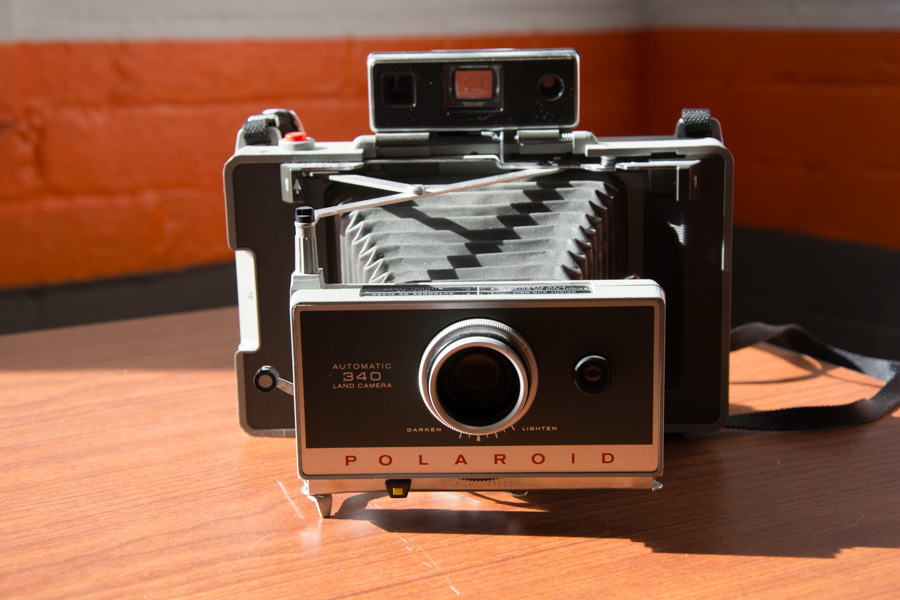
Hard light is created by light sources that are small. This light exhibits strong contrast, dark well defined shadows, and tends to not be very good for product photography. As you can see in this shot which was photographed with simple direct sunlight through a window, the hard light that the sun produces is not doing a great job of revealing the product detail at all.
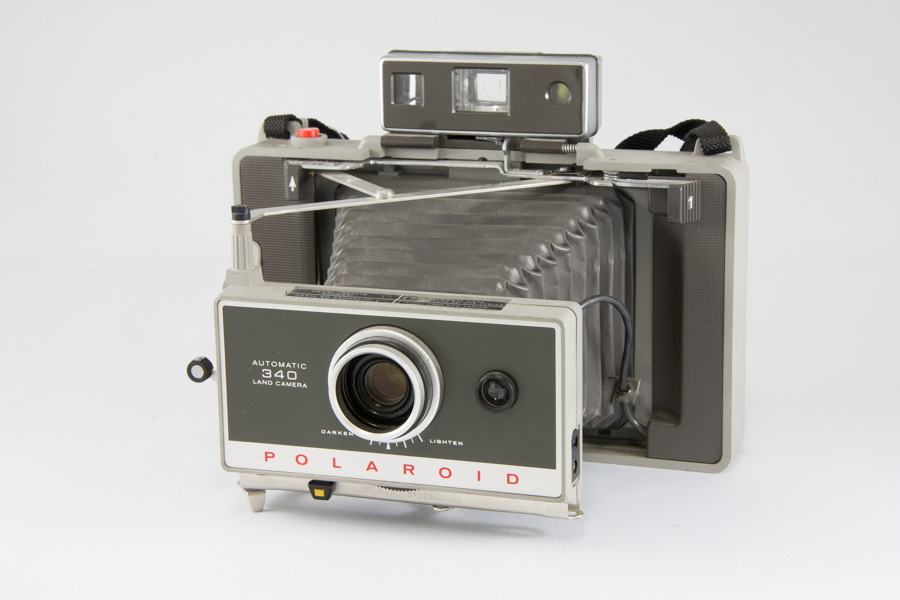
On the other hand, soft light is a wrapping, lower contrast light that reveals more detail and provides a more pleasing light to show the product as it truly is. A commercial photographer would use large softboxes to produce the soft light as they photograph their product on a table. For the rest of us, we can achieve this look simply by using a photo box. The photo box (also known as light tent, light box, etc) is made of diffusion material. You can position a couple of light sources (simple continuous lights or strobes if you desire) outside of the box, aimed towards the top or sides. The diffusion material takes this light and scatters it inside the box. The benefit is obvious; the subject inside the box is bathed in a soft, wrapping light on a clean background.
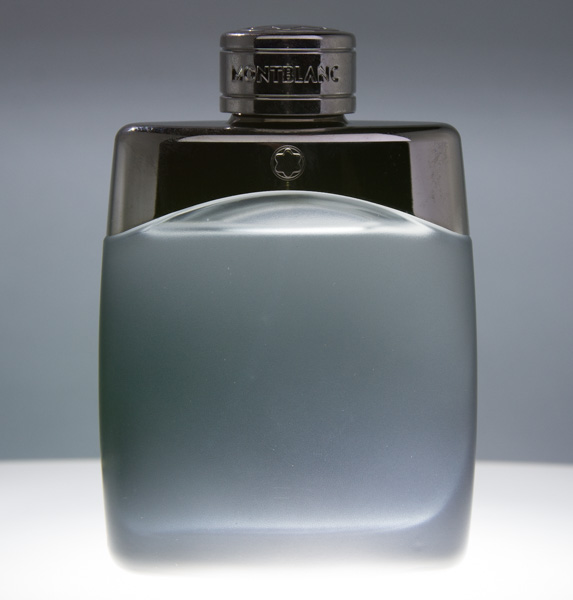
Another great feature of the photo box is the ability to change backgrounds to create a completely different look, or to supply a background of your own. Here we used a black backdrop for a more dramatic shot.

Another lighting possibility to consider is using small, simple LED lights that you can obtain at any hardware store. For this shot we positioned our cologne bottle on an elevated piece of plexiglass inside the photo box. Even though we didn’t use any of the diffusion abilities of the photo box for this shot, the interior of the box still makes for a nice clean environment with a simple elegant background. LED lights can be very handy for lighting smaller subjects. The light here was positioned under the elevated plexi and aimed up at the bottle. The net result is the bottle being illuminated from within.
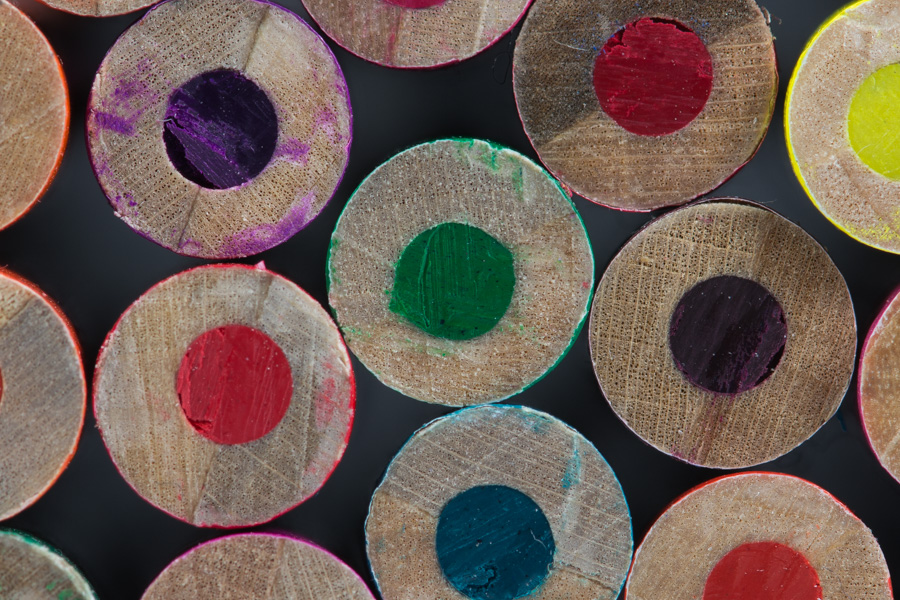
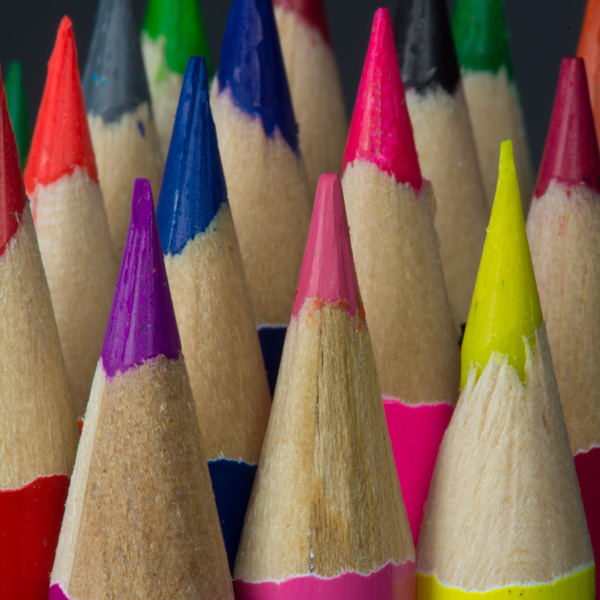
When photographing ‘macro’ subjects, you will be limited with regard to how close you can get with a normal lens. Adding an extension tube to your lens can dramatically improve this situation. The ultimate close up lens is a dedicated macro lens. When lighting macro subjects you can really get away with the simplest lighting of all. A common desk lamp or similar directed light source, placed off to the side and close to the subject will usually provide very good results. Placing the light source close to the subject increases it’s apparent size, which allows the light to ‘wrap’ around the subject more. If you wish, you could photograph your macro subjects inside a photo box for a very soft light as well. Here we used a 105mm macro lens for two different views of coloured pencils. Both of these shots were lit with a simple desk lamp.
If you’re photographing outdoors for plants, insects etc, you’ll need to consider how you’re going to get light on your subject. You could count on the available light in the scene, but that is a bit of a gamble given that the light from the sun may not be optimally positioned to light the subject from the desired angle.
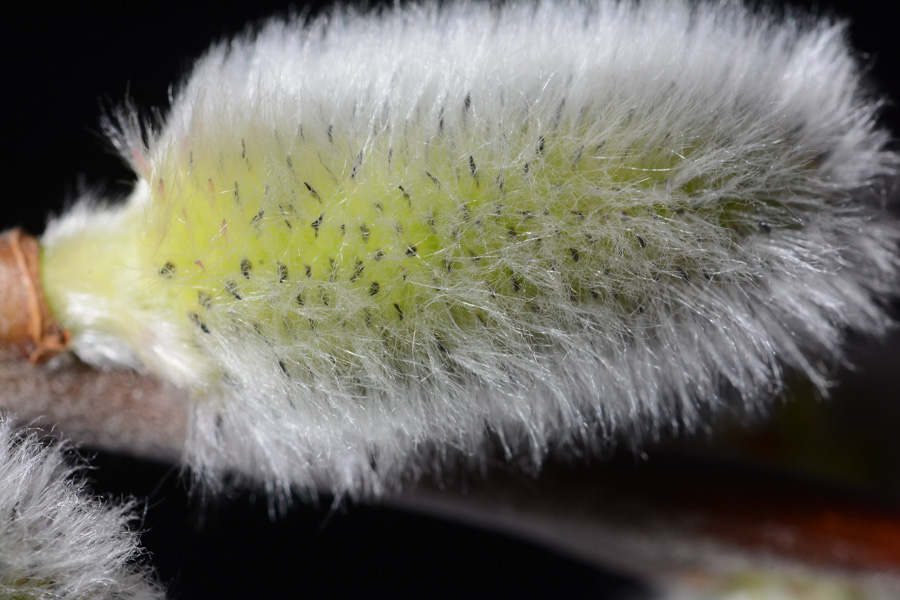
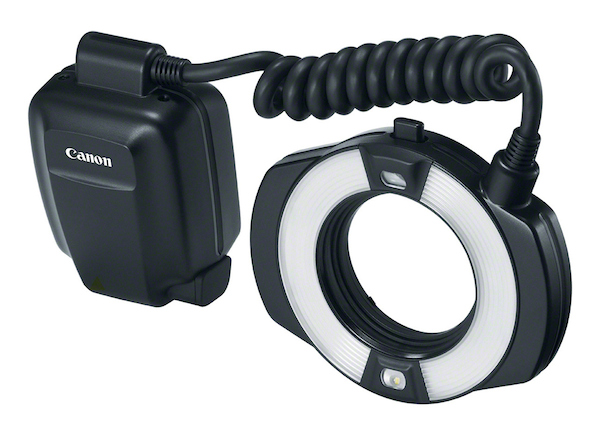
For these situations, a macro ring flash or similar camera mounted flash can solve the problem in a pinch. An additional benefit to using flash instead of the available light in the scene is that flash will ‘freeze’ a subject. Even with a mild breeze, plants can move enough to cause your photo to be blurry due to subject movement if shooting with available light.
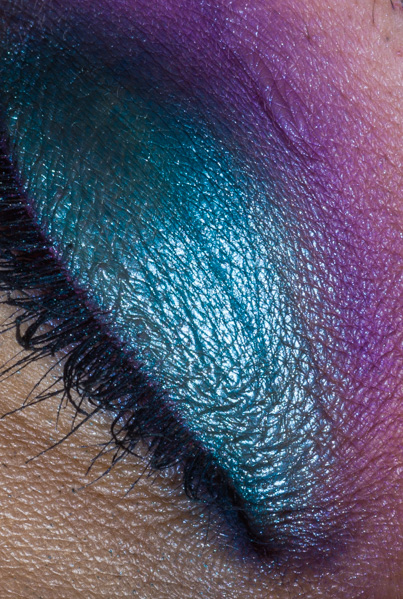
In my exploration of macro photography recently, I was able to make use of a macro lens during a beauty photography session. For this shot, I used my regular strobe lighting. This was helpful as the closeup shot of the eye required the subject to be very still. The flash from the strobe made freezing any subject motion a simple task. Keep in mind that the closer you get to a subject, the more ‘amplified’ subject and camera motion will be. For this reason a solid, steady tripod is an essential tool for success.


COMMENT (1)
Pingback: Getting Closer: Close-up and Macro Photography | Photography and video news, reviews and tips | Henry's Camera