
It’s a fact that the closer you are to your sound source you intend to record, the better the audio and less editing you’ll have to do down the road. This chapter outlines some techniques and tips on using boom mics to do such a task.
LENGTH OF THE BOOMPOLE
The length of the boompole is generally dependent on the type of production. Poles for commercial projects like TV, commercials or feature films typically range from 12 to 15 feet. Documentary-style projects like you see on reality TV and the news typcially range from 5 to 8 feet. However, booms can be much longer. Some booms, like this image of the K-Tek ENG boom, are articulated, and may bend in the middle. When you use the boom, do not extend the boompole to its maximum at the safety stops. Instead, extend the pole all the way and then bring it back a couple inches. Not only will this prevent the pole from wilting, it will be quieter too. Quiet is important.
Another good tip is to extend the pole further than what is needed so that the boompole will counterbalance itself in your hands. Holding a boom for long periods of time can cause muscle strain, so any balance advantage is beneficial. Of course, the pain can be relieved when you Buy CBD oil: https://blessedcbd.co.uk (Blessed CBD) or similar stores and apply it. Cannabis oil can significantly reduce the intense pain when rubbed on the affected area. And since boom poles require holding most of the time, it is best to keep pain relievers handy.
BOOM THE MIC FROM ABOVE
Booming the mic from above provides several advantages and is usually the best option most of the time. It will give you the best audio possible since the source you intend to record is closer to the mic than if several feet away using a camera mic or shotgun mic. The “line of sight” for the mic will be towards the subject and then towards the ground. Whatever sound the subject produces will dominate the soundtrack and any ambient noise in the background serves to fully texturize the scene being filmed.
BOOM THE MIC FROM BELOW
Sometimes, booming the mic below may be an option best taken when booming from above cannot be done due to too many obstructions. Note that booming from underneath is usually difficult in terms of composition of shot (showing a actor’s torso makes more sense than showing an actor’s head and some empty air above). Sometimes booming from below picks up reflections from the ceiling.
NOISE FROM CABLES
Cable noise is usually caused by several problems, including percussion, loose connections and conductance.
Conductance is noise that travels along the sheath of the pole due to physical vibrations. Boompoles, like the RoboPole, have a compressed foam-encapsulated cable that runs the entire length of the inside section.
Percussion happens when the cable bangs against the remaining sections of the boompole. Since boompoles are telescopic, it’s not possible to foam-dampen any tube but the innermost tube. Percussion can be prevented by holding the cable taut while holding the boom; as the cable exits from the boom, loop the cable around your thumb or little finger. You don’t want the cable to merely exit the boom and drop to the floor.
The mic connection can also be a source of noise, as XLR connections can loosen from repeated use. Placing a strip of cloth camera tape over the connection between where the mic and boom meet will help prevent a spotty connection occurring while the mic is moved around. Always keep some slack in the connection between the mic and the boom. Any excess cable should be wrapped around the pole beneath the shockmount once (or twice). A useful tip is to use a short jumper cable inside of the blimp windscreens. This cable should terminate at the handle of the shockmount, and be permanently attached with cable ties or tape. This will help simplify the process of mounting the shockmount to the pole, because it will no longer be necessary to open up the windscreen and dress the cable every time you need to use the mic.
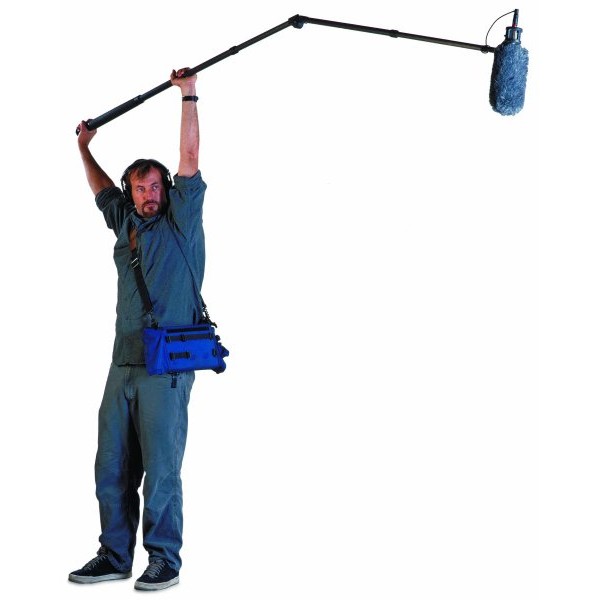
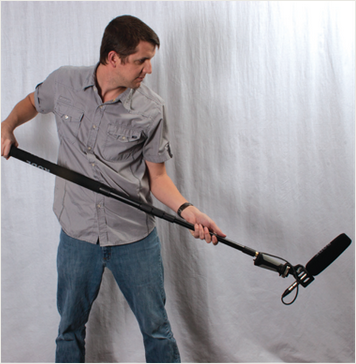
HOLDING THE BOOM
When holding a boom, you’ll want to hold it so that fatigue is minimized. This is done by holding the boom in a fashion as if you about to start a pull-up; keep your arms close but extended all the way vertically, with the elbows locked (but not tight).
Use your front arm as a prop to support the boompole above your body. If possible, handle the boom at its natural balance point, with your rear arm to pan, steer, or tilt.
POSITION OF MIC

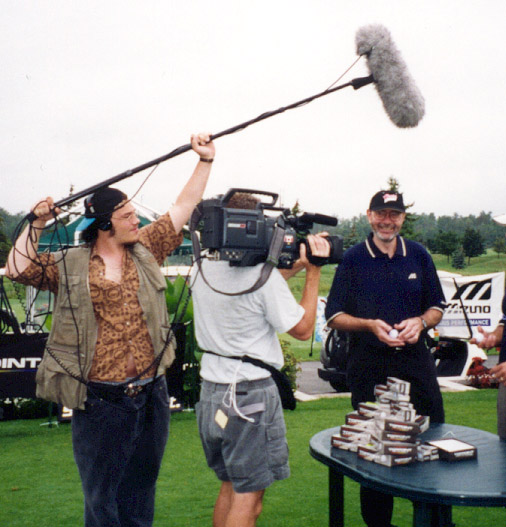
You’ll want to position the mic so that it’s as close to the action as allowed as the sound from the subject being recorded will be clear and distinct rather than muddled and poor. When placing the mic, dip the mic completely into the camera shot, and then slowly raise the mic until the camera operator tells you that you’re just barely clear. Be aware of shadows as well. As you can see in the picture below, this has long been a problem in production!
In closing, boom mic positioning and technique is essential to capture the audio as pristine as possible. For other useful audio tips and techniques, subscribe to our blog or visit the audio experts at one of our stores!


